A very easy and simple way to configure and set up a deep learning server with TensorFlow, Keras, Python, and Jupyter Notebook


Artificial intelligence (AI) fields such as machine learning and deep learning are rapidly developing, and deep learning recently becomes much more popular thanks to its supremacy regarding accuracy in the attempts to train a huge amount of data, i.e., big data. In recent years, AI deep learning has delivered stunning achievements in different areas including engineering, medicine, and manufacturing. To facilitate and speed up the tasks of building, training, and testing the neural networks, researchers and practitioners can use various AI frameworks of which TensorFlow, an open-source library developed by Google, is currently the most popular one. Manually installing all the required software applications including the tools, and making them work smoothly and reliably in a deep learning server, is not an easy task. It would be much easier to set up a remote server on the Google Cloud Platform (GCP) using a deep learning image ready for use with all necessary software applications and development tools. It is even better with a credit of $300.00 that can be used for the server.
1. Create Project in GCP
1.1 Create a Google Account or a Google Gmail Account
Using Google Cloud Platform requires a Google account or a Gmail account. If the user does not have it, he.she needs to create one
1.2 Get GCP $300 Credit for 12-Month Free Trial
Access the link:
Using the above Google account/Gmail to get this credit.
2. Access GCP Console
— ) Open Chrome browser
— ) Type: Google Cloud Console into the URL search box


3. Create Deep Learning Server Using GCP Deep Learning Images
Access the link of Cloud Deep Learning Virtual Machine Image at https://cloud.google.com/deep-learning-vm/

Click on Go to console


Click the arrow at the top menu bar to select a project, e.g., select the project named “EXAMPLE_PROJECT.” (NOTES: The new deep learning server will be created as a GCP Compute Engine instance under this project.)


Click LAUNCH ON COMPUTER ENGINE

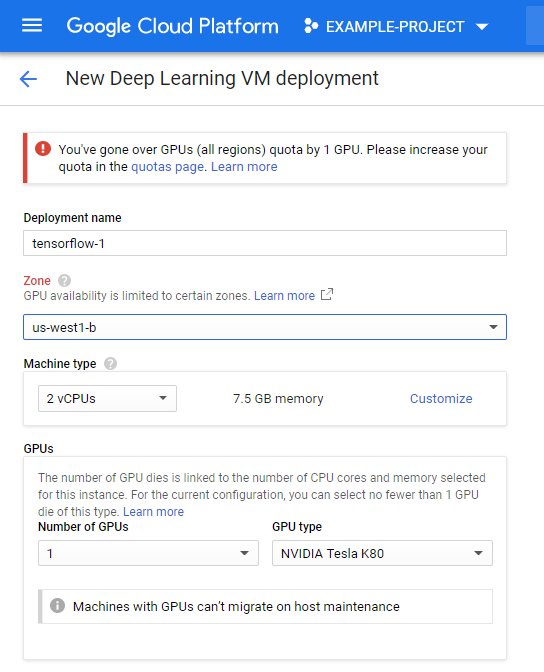
Enter a name for the instance, e.g., “tf1-keras-ann” (NOTES: The use can name the instance as he/she wants.)
Select for Zone: “us-east1-c” or any other zones available at this link: https://cloud.google.com/compute/docs/regions-zones/
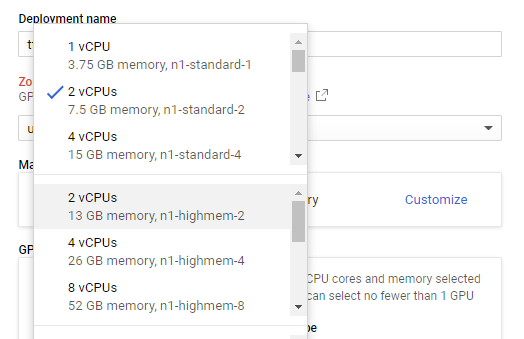
Select machine type: Click on the arrow to open a drop-down menu and select the machine type: n1-standard-8 is a decent choice for a normal deep learning project.

Select the number of GPU


To reduce the cost of using the service, select “None.” However, if the user needs it, select the number of the GPU’s to be deployed.
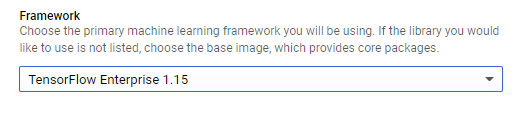
Select the version of the AI Framework: Select TensorFlow 1.xx or TensorFlow 2.0.

Select the Boot Disk type and size

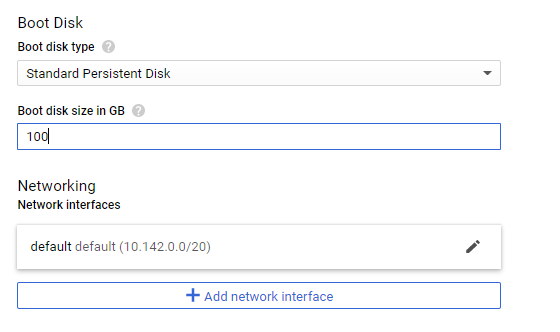
Select Standard Persistent Disk or SSD Persistent Disk
Enter for Boot disk size in GB: 64 GB or greater
Enter for Boot disk size in GB: 64 GB or greater
Click Deploy

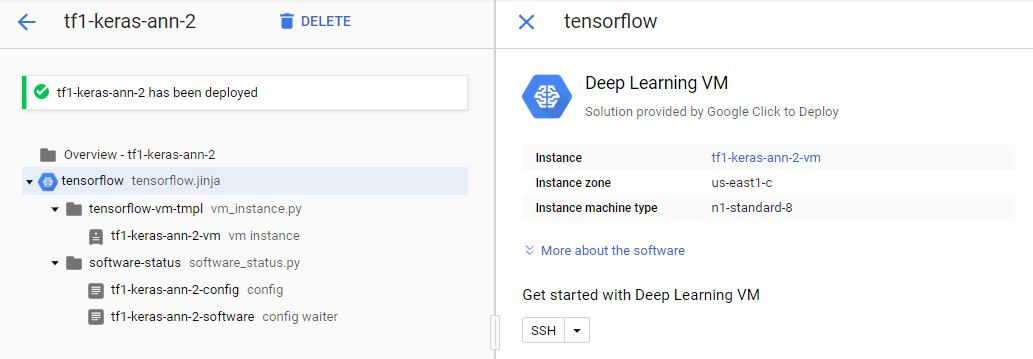
… Wait for the deployment of the Deep Learning Server to be deployed ………..
Click the Products and Services icon (Three horizontal bars on the top left corner) to open the menu


Select Compute Engine


IT’S DONE!
The deep learning server has been set up successfully on Google Cloud Platform (GCP).
IMPORTANT NOTES:
— ) The user MUST stop the virtual machine while not using it to avoid unnecessary charges.


No comments:
Post a Comment