If you need help building an NLP pipeline or evaluating models check out our last article. We covered some NLP basics and how to build an NLP pipeline with Scikit-Learn. Then we evaluated some model metrics and decided on the best model for our problem and data.
Be sure to check out the README and code in our GitHub repository instructions on setting up this app locally with Docker!
Before deploying our model to the cloud, we need to build an app to serve our model.
Building the App
The application to serve this model is simple. We just need to import our model into the app, receive a POST request and return the model’s response to that POST.
Here is the app code.
Notice that the data_dict is the Python dictionary corresponding to the payload sent via the POST request. From this dictionary we can extract the text to be categorized. This means our POSTs need the same key. So we are going to send JSONs with the {key: value} being {"text": "message") .
Since the Scikit-Learn pipeline expects a list of strings we have to wrap the text as a list. Also, when receiving the result from the model’s .predict method, we receive a list with a single element and unpack it to access the prediction.
Once we have the app running locally without bugs, we are ready to make some changes to our repository to prepare for deployment.
Keep in mind we are using the package and environment manager pipenv to handle our app’s dependencies. If you are not familiar with virtual environment and package management, you may need to install this and set up a virtual environment using the Pipfile in the Github repository. Check out this article for help doing that!
Containerizing the App
We need to make some final changes to our project files in preparation for deployment. In our project, we’ve used pipenv and pipenv-to-requirements to handle dependencies and generate a requirements.txt. All you'll need for your Docker container is the requirements.txt file.
Be sure to git add the Dockerfile you made earlier to your repository.
Here is the link to our Pipfile for dependencies on this project.
Docker and Dockerfiles
Before we get the app running in the cloud, we must first Dockerize it. Check out our README in the GitHub repository for instructions on setting up this app locally with Docker.

Docker is the best way to put apps into production. Docker uses a Dockerfile to build a container. The built container is stored in Google Container Registry were it can be deployed. Docker containers can be built locally and will run on any system running Docker.
Here is the Dockerfile we used for this project:
The first line of every Dockerfile begins with FROM. This is where we import our OS or programming language. The next line, starting with ENV, sets our environment variable ENV to APP_HOME / app . This mimics the structure of our project directories, letting Docker know where our app is.
These lines are part of the Python cloud platform structure and you can read more about them in Google’s cloud documentation.
The WORKDIR line sets our working directory to $APP_HOME. Then, the Copy line makes local files available in the docker container.
The next two lines involve setting up the environment and executing it on the server. The RUN command can be followed with any bash code you would like executed. We use RUN to pip install our requirements. Then CMD to run our HTTP server gunicorn. The arguments in this last line bind our container to$PORT, assign the port a worker, specify the number of threads to use at that port and state the path to the app asapp.main:app.
You can add a .dockerignore file to exclude files from your container image. The .dockerignore is used to keep files out of your container. For example, you likely do not want to include your test suite in your container.
To exclude files from being uploaded to Cloud Build, add a.gcloudignore file. Since Cloud Build copies your files to the cloud, you may want to omit images or data to cut down on storage costs.
If you would like to use these, be sure to check out the documentation for .dockerignore and .gcloudignorefiles, however, know that the pattern is the same as a.gitignore !
Building and Starting the Docker Container Locally
Name and build the container with this line. We are calling our container spam-detector.
docker build . -t spam-detectorTo start our container we must use this line to specify what ports the container will use. We set the internal port to 8000 and the external port to 5000. We also set the environment variable PORT to 8000 and enter the container name.
PORT=8000 && docker run -p 5000:${PORT} -e PORT=${PORT} spam-detectorNow our app should be up and running in our local Docker container.
Let’s send some JSONs to the app at the localhost address provided in the terminal where you’ve run the build.
Testing the app with Postman
Postman is a software development tool that enables people to test calls to APIs. Postman users enter data. The data is sent to a web server address. Information is returned as a response or an error, which Postman presents to the user.
Postman makes it easy to test our route. Open up the GUI and
- Select POST and paste the URL, adding the route as needed
- Click Body and then raw
- Select JSON from the dropdown to the right
Be sure to use “text” as the key in your JSON, or the app will throw an error. Place any text you would like the model to process as the value. Now hit send!

Then view the result in Postman! It looks like our email was categorized as ham. If you receive an error be sure you’ve used the correct key and have the route extension /predict in the POST URL.

Let’s try an email from my Gmail spam folder.

Hmm, it looks like we are running a different model than Google.
Now let’s test the app without Postman using just the command line.
Testing the app with curl
Curl can be a simple tool for testing that allows us to remain in a CLI. I had to do some tweaking to get the command to work with the app, but adding the flags below resolved the errors.
Open the terminal and insert the following. Change the text value to see what the model classifies as spam and ham.
curl -H "Content-Type: application/json" --request POST -d '{"text": "Spam is my name now give all your money to me"}' http://127.0.0.1:5000/predictThe result, or an error, will populate in the terminal!
{"result":"ham"}Now let’s get the app deployed to Google Cloud Platform so anyone can use it.
Docker Images and Google Cloud Registry
GCP Cloud Build allows you to build containers remotely using the instructions contained in Dockerfiles. Remote builds are easy to integrate into CI/CD pipelines. They also save local computational time and energy as Docker uses lots of RAM.
Once we have our Dockerfile ready, we can build our container image using Cloud Build.
Run the following command from the directory containing the Dockerfile:
gcloud builds submit --tag gcr.io/PROJECT-ID/container-nameNote: Replace PROJECT-ID with your GCP project ID and container-name with your container name. You can view your project ID by running the command gcloud config get-value project.
This Docker image now accessible at the GCP container registry or GCR and can be accessed via URL with Cloud Run.
Deploy the container image using the CLI
- Deploy using the following command:
gcloud run deploy --image gcr.io/PROJECT-ID/container-name --platform managedNote: Replace PROJECT-ID with your GCP project ID and container-name with your containers’ name. You can view your project ID by running the command gcloud config get-value project.
2. You will be prompted for service name and region: select the service name and region of your choice.
3. You will be prompted to allow unauthenticated invocations: respond y if you want public access, and n to limit IP access to resources in the same google project.
4. Wait a few moments until the deployment is complete. On success, the command line displays the service URL.
5. Visit your deployed container by opening the service URL in a web browser.
Deploy the container image using the GUI
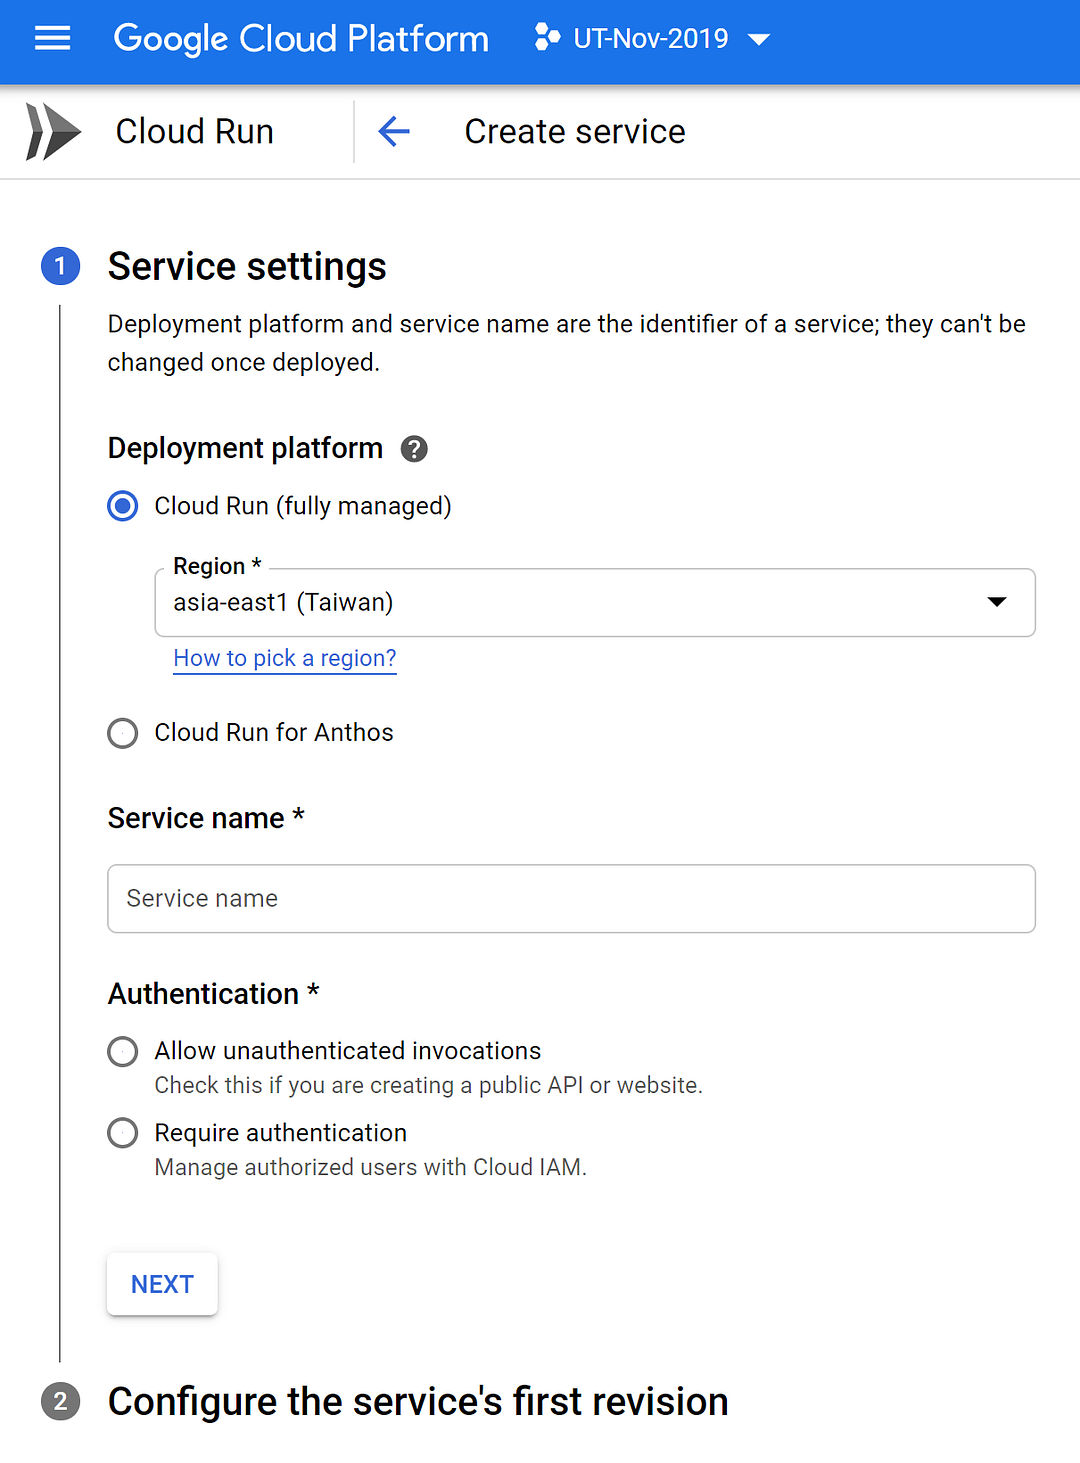
Now that we have a container image stored in GCR, we are ready to deploy our application. Visit GCP cloud run and click create service, be sure to set up billing as required.

Select the region you would like to serve and specify a unique service name. Then choose between public or private access to your application by choosing unauthenticated or authenticated, respectively.
Now we use our GCR container image URL from above. Paste in the URL or click select and find it using a dropdown list. Check out the advanced settings to specify server hardware, container port and additional commands, maximum requests and scaling behaviors.
Click create when you’re ready to build and deploy!

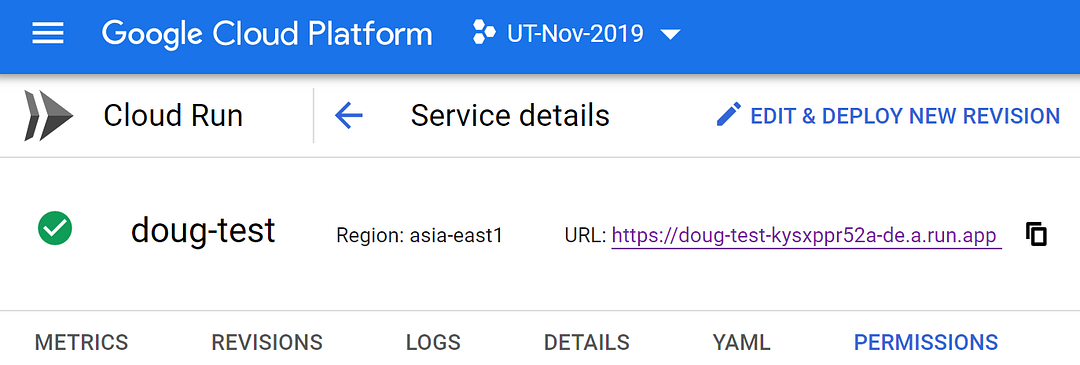
You’ll be brought to the GCP Cloud Run service details page where you can manage the service and view metrics and build logs.

Click the URL to view your deployed application!

Congratulations! You have just deployed an application packaged in a container to Cloud Run.
You only pay for the CPU, memory, and networking consumed during request handling. That being said, be sure to shut down your services when you do not want to pay for them!
Conclusion
We’ve covered setting up an app to serve a model and building docker containers locally. Then we dockerized our app and tested it locally. Next, we stored our docker image in the cloud and used it to build an app on Google Cloud Run.
Getting any decently good model out quickly can have significant business and tech value. Value from having something people can immediately use and from having software deployed that a data scientist can tune later.
We hope this content is informative and helpful, let us know what you are looking to learn more about in the software, development and machine learning space!


No comments:
Post a Comment