Remember Todd’s post about creating your Always Free Autonomous Database? What’s next? How about starting to work with it using Python language?
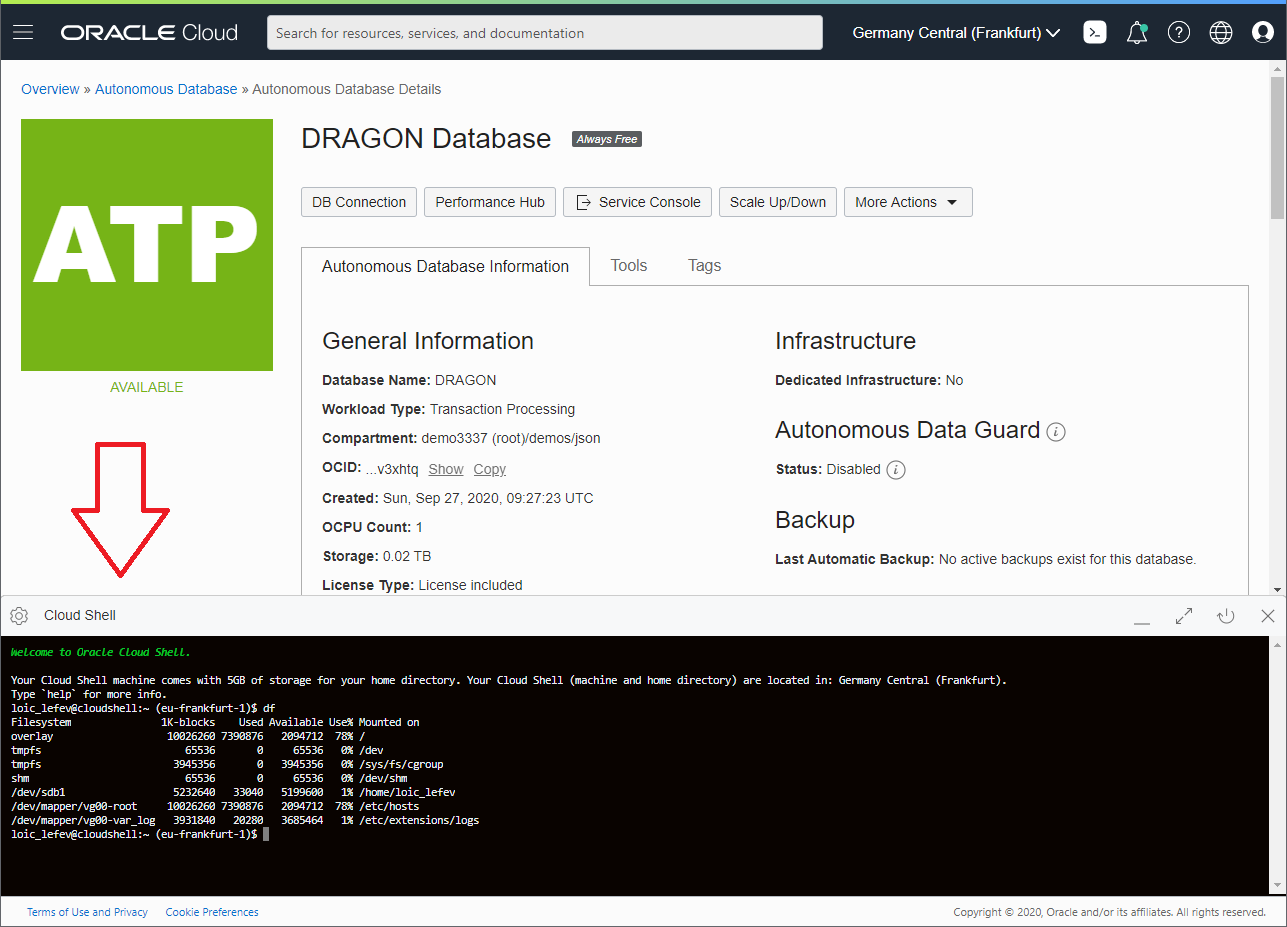
In your OCI (Oracle Cloud Infrastructure) web console, click on the Cloud Shell icon in the upper right corner. This opens a Linux shell right inside your browser! The first run might take more than one minute in order to configure it. You’ll have up to 5 GB of storage and numerous tools pre-installed.
Cloud Shell open
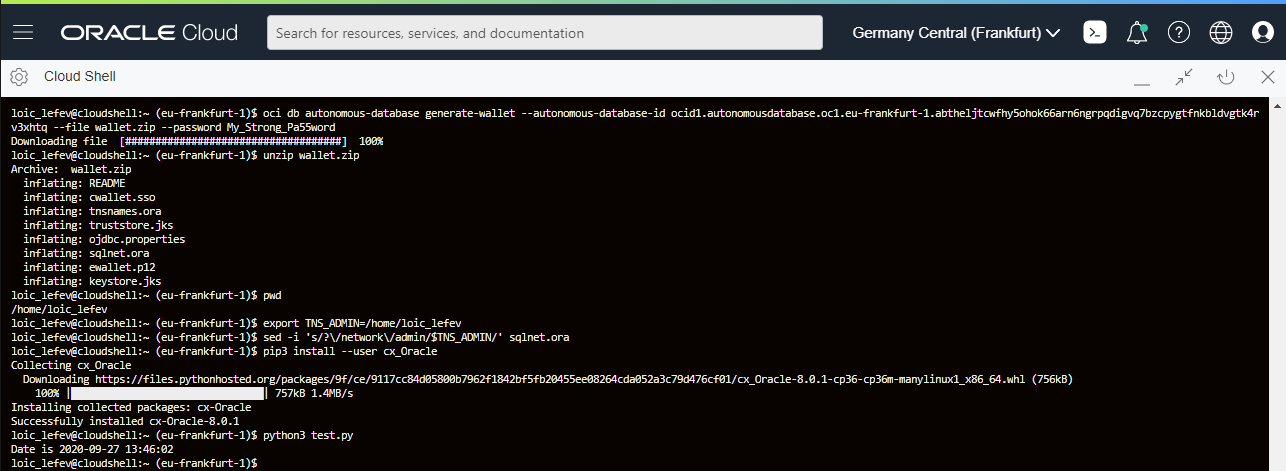
Now the fun part… In order to run a test program that will display the date and time, you’ll need to download and unzip the Autonomous Database wallet.
You’ll also need to set up the environment (TNS_ADMIN environment variable) so that the driver can find the connection string stored inside the tnsnames.ora file.
$ pwd$ export TNS_ADMIN=/home/loic_lefev$ sed -i 's/?\/network\/admin/$TNS_ADMIN/' sqlnet.ora
Finally, you’ll have to install the Oracle Python driver using the pip3 package manager.
$ pip3 install --user cx_Oracle
The following program can be copied and pasted right into a file named test.py:
def selectdate(connection): with connection: cursor = connection.cursor() result = cursor.execute('''select to_char(sysdate,'yyyy-mm-dd hh24:mi:ss') from dual''') data = result.fetchone() print("Date is " + data[0])
if __name__ == '__main__': connection = connect() selectdate(connection)
And when run, it will display the expected result:
$ python3 test.py
Date is 2020-09-27 13:46:02
Oracle Cloud Shell running a python script that connects to an Always Free Autonomous Transaction Processing database.
Sampling is used when we try to draw a conclusion without knowing the population. Population refers to the complete collection of observations we want to study, and a sample is a subset of the target population. Here’s an example. A Gallup poll¹, conducted between July 15 to 31 last year, found that 42% of Americans approve of the way Donald Trump is handling his job as president. The results were based on telephone interviews of a random sample of ~4500 calls (assuming one adult per call. ~4500 adults), aged 18 and older, living in the U.S. The poll was conducted during a period of controversy over Trump’s social media comments. For this survey, the population is ALL the U.S citizens aged 18 and older, and the sample is 4500 adults.
If sampling is done wrong, it will lead to biases that affect the accuracy of your research/survey results. To avoid selection biases, we have to carefully choose a subset of a populationthat can be representative of the group as a whole.
Types of Probability Sampling
Simple Random Sampling
Image by Author using Powerpoint
Simple random sampling means we randomly select samples from the population where every unit has the same probability of being selected.
Pros: there’s no need to divide the population into subgroups or take any other additional steps before selecting members of the population at random.
Cons: the samples might not be representative, and it could be time-consuming for large populations.
Use Case: it’s used when we don’t know too much about the population.
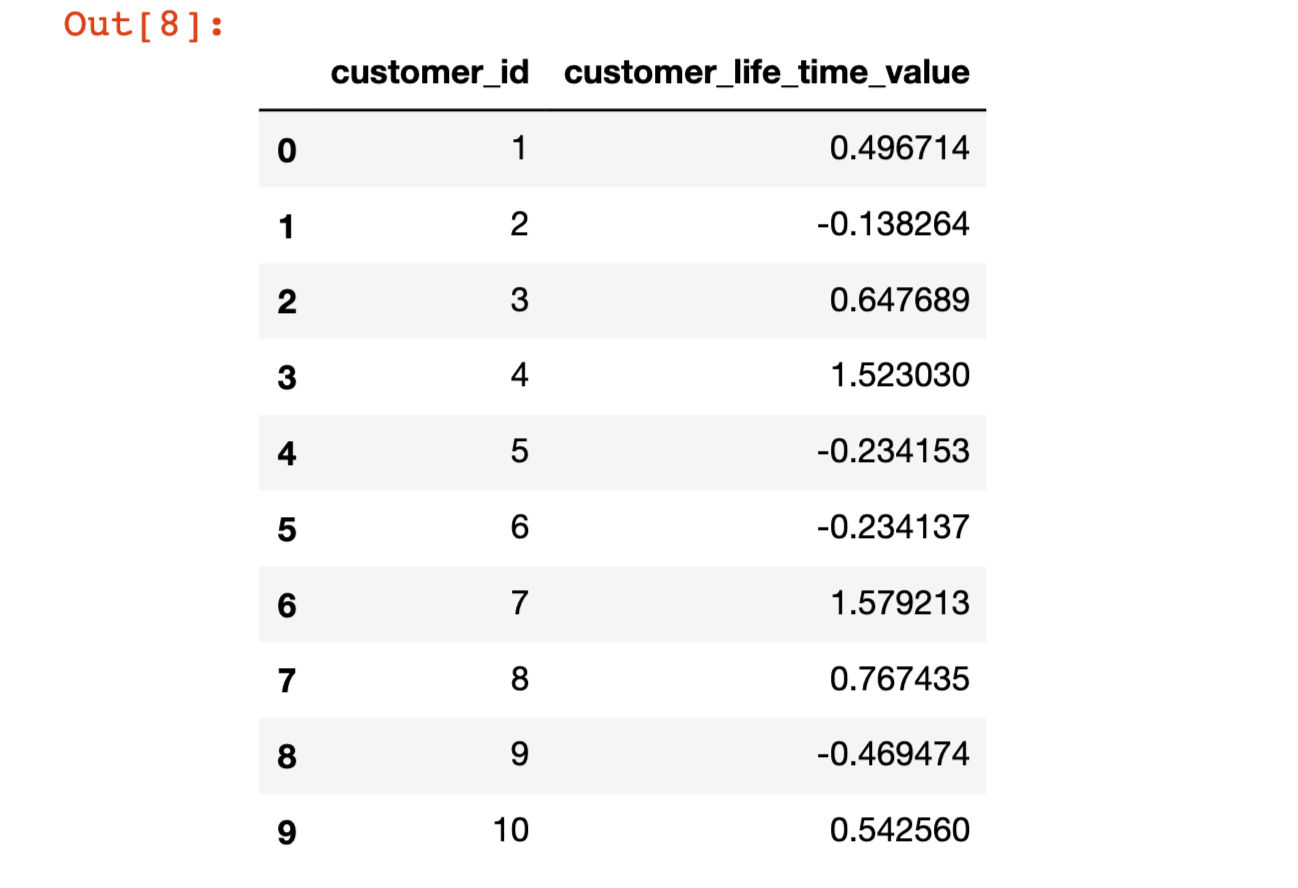
#let's create a dataframe first!
import numpy as np
import pandas as pd
from numpy.random import randn
# Define total number of customers
number_of_customers = 10
# Create data dictionary
data = {'customer_id':np.arange(1, number_of_customers+1).tolist(),
       'customer_life_time_value':randn(10)}
# Transform dictionary into a data frame
df = pd.DataFrame(data)
# View data frame
df
Created a data frame (Image by Author)
#only using random(), we can generate 4 samples from this dataset
# Obtain simple random samplesimple_random_sample = df.sample(n=4).sort_values(by='customer_id')
simple_random_sample
Randomly selected customers (Image by Author)
Stratified Sampling
Image by Author using Powerpoint
For stratified sampling the population is divided into subgroups (called strata), then randomly select samples from each stratum.
Pros: it captures key population characteristics, so the sample is more representative of the population.
Cons: it’s ineffective if subgroups cannot be formed.
Use Case: it’s commonly used in geographic sampling where strata can be states, countries, or ecoregions.
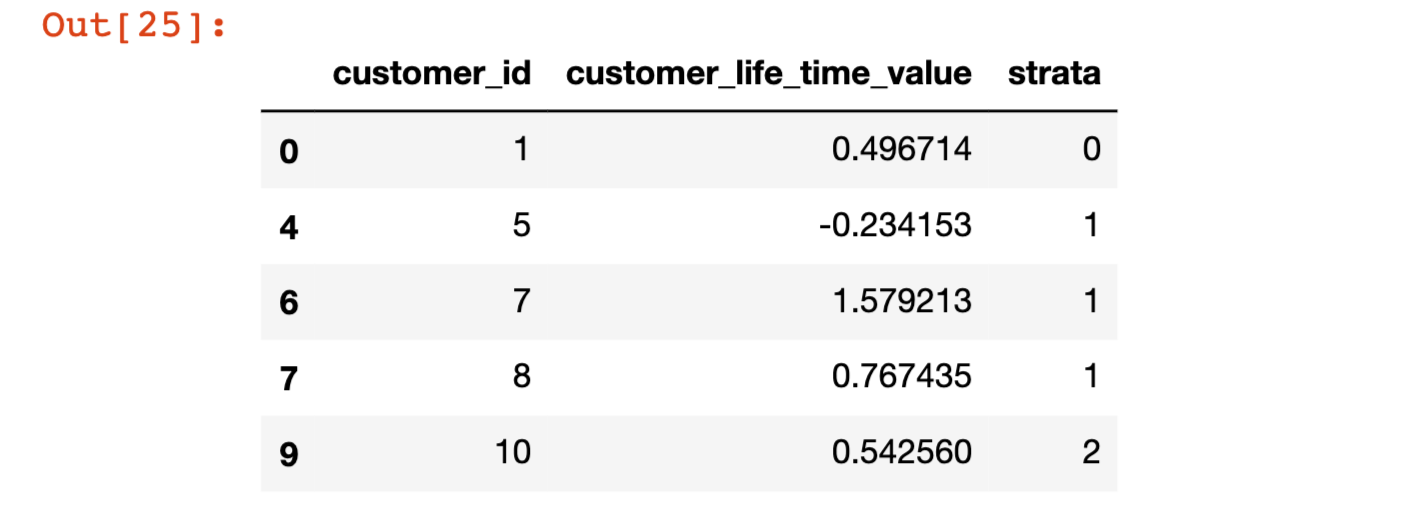
#Let's add subgroup labels to the datasetdf['strata']=[0, 0, 0, 1, 1, 1, 1, 1, 2, 2]sss = StratifiedShuffleSplit(n_splits=5, test_size=0.5, random_state=0)for x, y in sss.split(df, df['strata']):
    stratified_random_sample = df.iloc[y].sort_values(by='customer_id')
stratified_random_sample
Randomly selected customers from each stratum (Image by Author)
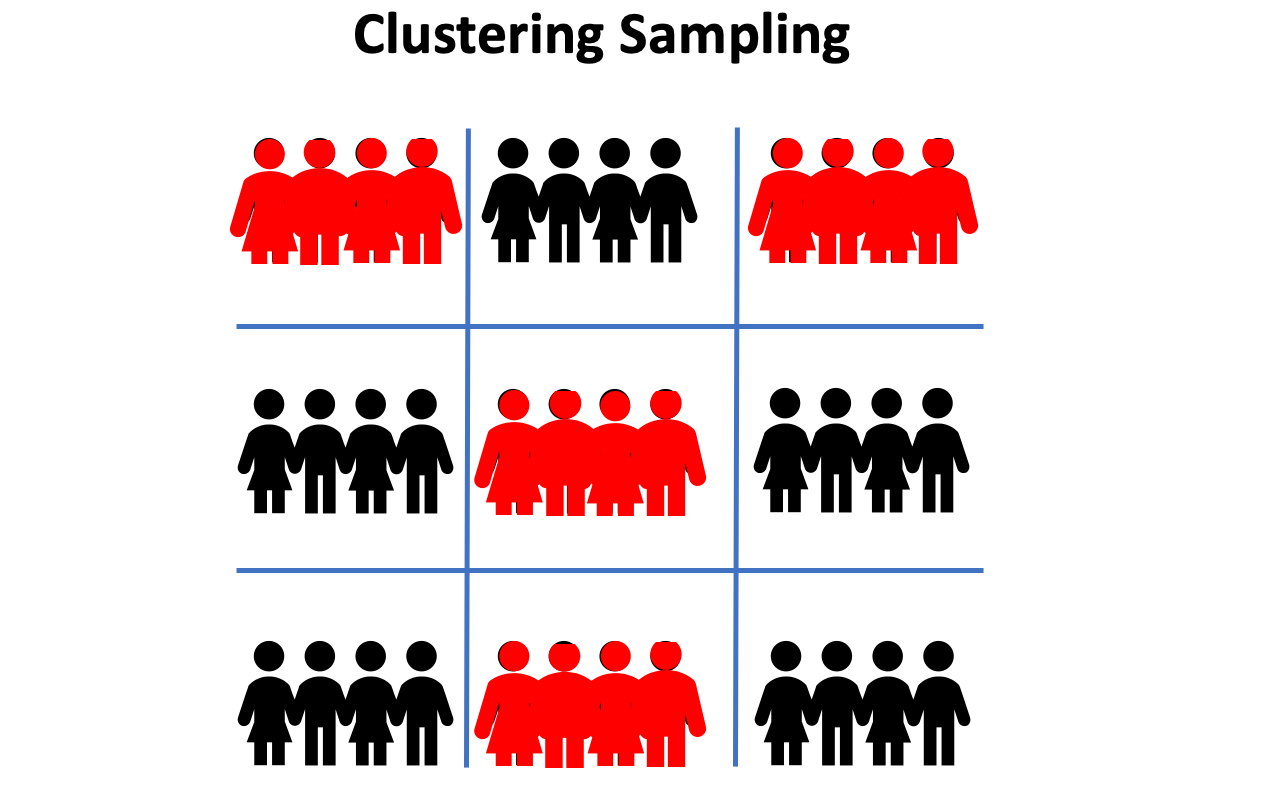
Cluster Sampling
Image by Author using Powerpoint
For clustering sampling, the population is divided into different clusters. Then a fixed number of clusters are randomly sampled and all units within each of the selected clusters are included in the sample.
Pros: it reduces variability, and it’s easy to conduct.
Cons: it is possible to introduce bias during sampling.
Use Case: it’s used when all individuals in each cluster can be representative of the populations.
#create 4 different clusters based on customers' lift time valuesdf['cluster'] = pd.cut(df['customer_life_time_value'], bins=4, labels=False) +1
Added “cluster” column (Image by Author)
# predefine which clusters/groups we want to select samples fromn=[2,4]def clustering_sampling(df,n):
    df_list=[]
    for i in range(len(n)):
        df1=df[df['cluster']==n[i]]
        df_list.append(df1)
    final_df=pd.concat(df_list, ignore_index=True)

    return final_dfclustering_sampling(df,n)
Selected all customers from cluster 2 and 4 in the sample (Image by Author)
Systematic Sampling
Select every other person from the population (Image by Author using Powerpoint)
A systematic sample is drawn by selecting units systematically from a sample frame. (i.e every other unit is included in the sample)
Pros: it can eliminate clustered selection, and it’s simple to execute.
Cons: we need to predetermine the estimated population size. It doesn’t work well if the population has a type of standardized pattern.
Use Case: it’s used when the relevant data does not exhibit patterns.
Geolocator Get the last known location; Get the current location of the device; Get continuous location updates; Check if location services are enabled on the device; Calculate the distance (in meters) between two geocoordinates; Calculate the bearing between two geocoordinates;
example: converting location to getting address of place
Converting this Into an Address We don’t have to stop there though! We can get a Placemark which is essentially an approximation of the user’s current location from the latitude and longitude. Let’s see this in action:
GeoLocator -- gives more control on current location. Little advanced than location plugin.
Geocoder - Forward and reverse geocoding.
example: import 'package:geocoder/geocoder.dart';
// From a query final query = "1600 Amphiteatre Parkway, Mountain View"; var addresses = await Geocoder.local.findAddressesFromQuery(query); var first = addresses.first; print("${first.featureName} : ${first.coordinates}");
// From coordinates final coordinates = new Coordinates(1.10, 45.50); addresses = await Geocoder.local.findAddressesFromCoordinates(coordinates); first = addresses.first; print("${first.featureName} : ${first.addressLine}");


