

Building a ML model is a crucial task. Running ML model in production is not a less complex and important task. I had a post in the past about serving ML model through Flask REST API — Publishing Machine Learning API with Python Flask. While this approach works, it certainly lacks some important points:
- Model versioning
- Request batching
- Multithreading
TensorFlow comes with a set of tools to help you run ML model in production. One of these tools — TensorFlow Serving. There is an excellent tutorial that describes how to configure and run it — TensorFlow Serving with Docker. I will follow the same steps in my example.
TensorFlow Serving provides model versioning functionality. The client can access a specific model version or get to the latest version by default. When the model gets saved, we can generate a model version using the current timestamp:
import calendar;
import time;
ts = calendar.timegm(time.gmtime())tf.saved_model.save(model, "./model_report_exec_time/" + str(ts))
This is the generated folder structure, the model is versioned with a timestamp:


I prefer to run TensorFlow Serving in my own Docker container. As per the instructions, there is an option to copy ML model into TensorFlow Serving container. First, create a base container from tensorflow/serving image:
docker run -d --name serving_base tensorflow/serving
Copy ML model from a local folder into the base container (in my case, both model_folder and model_name are set to model_report_exec_time):
docker cp <model_folder> serving_base:/models/<model_name>
Now you can double-check if the model was copied successfully. Enter into the container:
docker exec -it serving_base bash
Navigate to models folder, you should see your ML model there:


Now create a new Docker container and set your ML model name to the environment variable, this way the model will be served on next container startup:
docker commit --change "ENV MODEL_NAME <model_name>" serving_base katanaml/core-serving:v19.8
You don’t need base container anymore, remove it:
docker kill serving_base
docker rm serving_base
Start container from your newly created image (REST endpoint runs on port 8501):
docker run -d -p 8500:8500 -p 8501:8501 --name katana-ml-serving katanaml/core-serving:v19.8
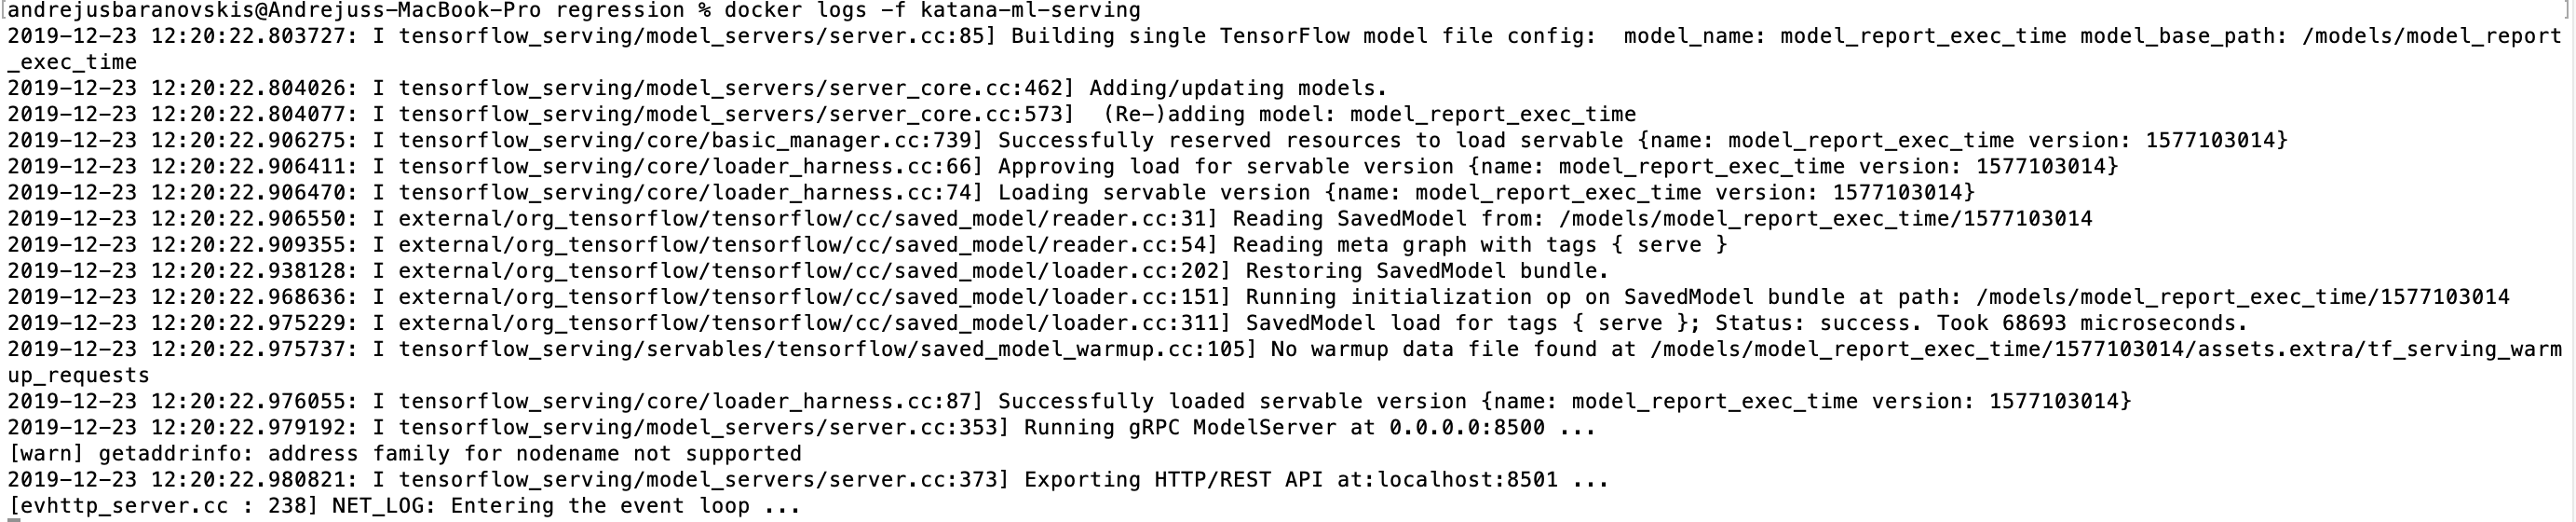
Check container logs, to make sure TensorFlow Serving starts without errors:
docker logs -f katana-ml-serving

I would recommend to go through RESTful API guide for TensorFlow Serving. You should check if the model endpoint is available, execute GET: http://localhost:8501/v1/models/<model_name>. This should return model version status:


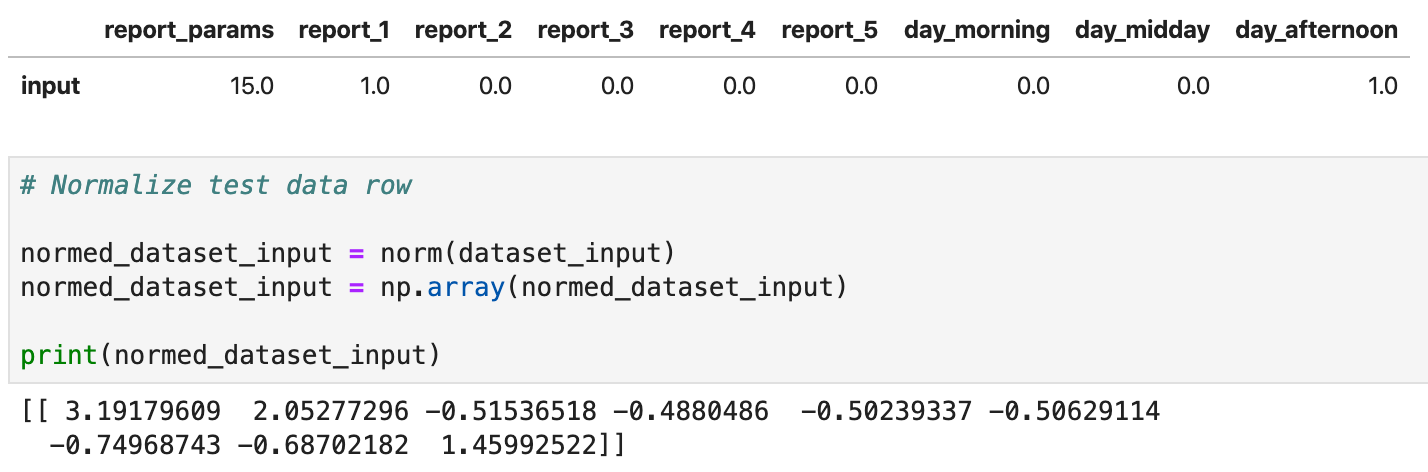
If GET response is successful, we can go further and execute ML model predict function. With TensorFlow Serving, it is possible to call predict function directly through POST request, parameters can be passed through a variable called instances. ML model accepts normalized data, this means data should be normalized before calling predict endpoint. In this example, data is normalized in Python (check ML model described in this post — Report Time Execution Prediction with Keras and TensorFlow):

Predict request is executed with CURL:
curl -d '{"instances": [[ 3.19179609,  2.05277296, -0.51536518, -0.4880486,  -0.50239337, -0.50629114, -0.74968743, -0.68702182,  1.45992522]]}' \
     -X POST http://localhost:8501/v1/models/model_report_exec_time:predict
The response returns prediction: 424.9289
Resources:
- GitHub repo with source code
- Report Time Execution Prediction with Keras and TensorFlow
- TensorFlow Serving with Docker


No comments:
Post a Comment