Airflow is a tool for automating and scheduling tasks and workflows. If you want to work efficiently as a data scientist, data analyst or data engineer it is essential to have a tool that can automate the processes you want to repeat on a regular basis. This can be anything from extracting, transforming and loading data for a regular analytics report to automatically re-training a machine learning model.
Airflow allows you to easily automate simple to complex processes primarily written in Python and SQL and has a rich web UI to visualise, monitor and fix any issues that may arise.
The following article is a complete introduction to the tool. I have included everything from installation in a virtual environment to running your first dag in easy to follow steps.
I have divided the tutorial into 6 parts to make it easier to follow and so that you can skip parts you may already be familiar with. The following steps are included:
- Basic Airflow concepts.
- How to set up an Airflow installation in a virtual environment.
- Running the Airflow web UI and scheduler.
- A list of common CLI commands.
- A tour of the web UI.
- Creating a real-world example DAG.
1. Basic concepts
Before talking through the installation and usage of Airflow I am going to briefly cover a couple of concepts that are central to the tool.
DAGS
At the heart of the tool is the concept of a DAG (Directed Acrylic Graph). A DAG is a series of tasks that you want to run as part of your workflow. This might include something like extracting data via a SQL query, performing some calculations with Python and then loading the transformed data into a new table. In Airflow each of these steps would be written as individual tasks in a DAG.
Airflow enables you to also specify the relationship between the tasks, any dependencies (e.g. data having loaded in a table before a task is run) and the order in which the tasks should be run.
A DAG is written in Python and saved as a
.py file. The DAG_ID is used extensively by the tool to orchestrate the running of the DAG’s.DAG Runs
We specificy when a DAG should run automatically via an execution_date. A DAG is run to a specified schedule (defined by a CRON expression) this could be daily, weekly, every minute, or pretty much any other time interval
Operators
An operator encapsulates the operation to be performed in each task in a DAG. Airflow has a wide range of built-in operators that can perform specific tasks some of which are platform-specific. Additionally, it is possible to create your own custom operators.
2. Installation
I am going to give you my personal set up for airflow in an isolated pipenv environment. The steps may differ if you use a different virtual environment tool. Much of this set up was inspired by this excellent Stackoverflow thread.
It is a good idea to use version control for your Airflow projects therefore the first step is to create a repository on Github. I have called mine
airflow_sandbox . Once you have created the repository clone to your local environment using git clone "git web url" .
From the terminal navigate to the directory e.g.
cd /path/to/my_airflow_directory .
Once in the correct directory, we install the pipenv environment along with a specific version of Python, Airflow itself and Flask which is a required dependency for running Airflow. For everything to work nicely it is a good idea to specificy specific versions for all installations.
pipenv install --python=3.7 Flask==1.0.3 apache-airflow==1.10.3
Airflow requires a location on your local system to run known as AIRFLOW_HOME. If we don’t specify this it will default to your route directory. I prefer to set Airflow in the route of the project directory I am working in by specifying it in a .env file. To do this simply run the following.
echo "AIRFLOW_HOME=${PWD}/airflow" >> .env
Next, we initialise the pipenv environment.
pipenv shell
Airflow requires a database backend to run. The default set up uses a SQLite database for this and this is fine to use for learning and experimentation. If you want to set up your own database backend the airflow documentation has a good guide. To initialise the database type.
airflow initdb
Finally, we make a directory to store our dags.
mkdir -p ${AIRFLOW_HOME}/dags/
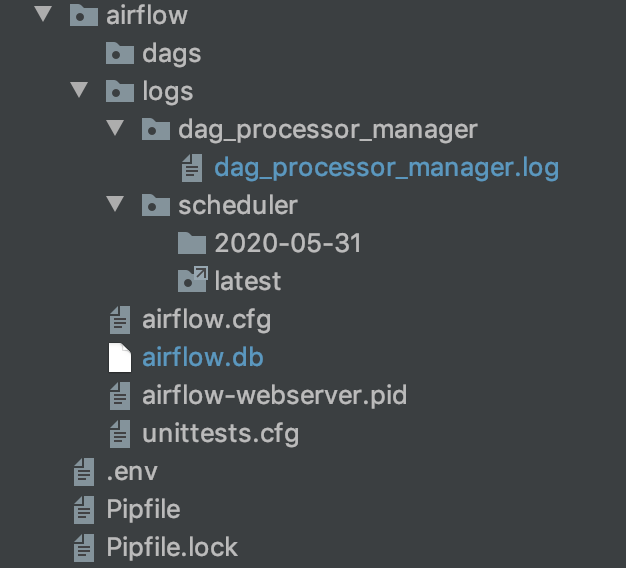
That is the initial basic set up complete. You should now have a project structure that looks as follows.
3. Running Airflow
Airflow has an excellent web UI where you can view and monitor your dags. To start the webserver to view the UI simply run the following CLI command. By default, Airflow will use the port 8080 as I am already using that to run something else I am specifying 8081.
airflow webserver -p 8081
We also need to start the scheduler.
airflow scheduler
Now if we navigate to http://localhost:8081/admin/?showPaused=True. We will see the following screen.
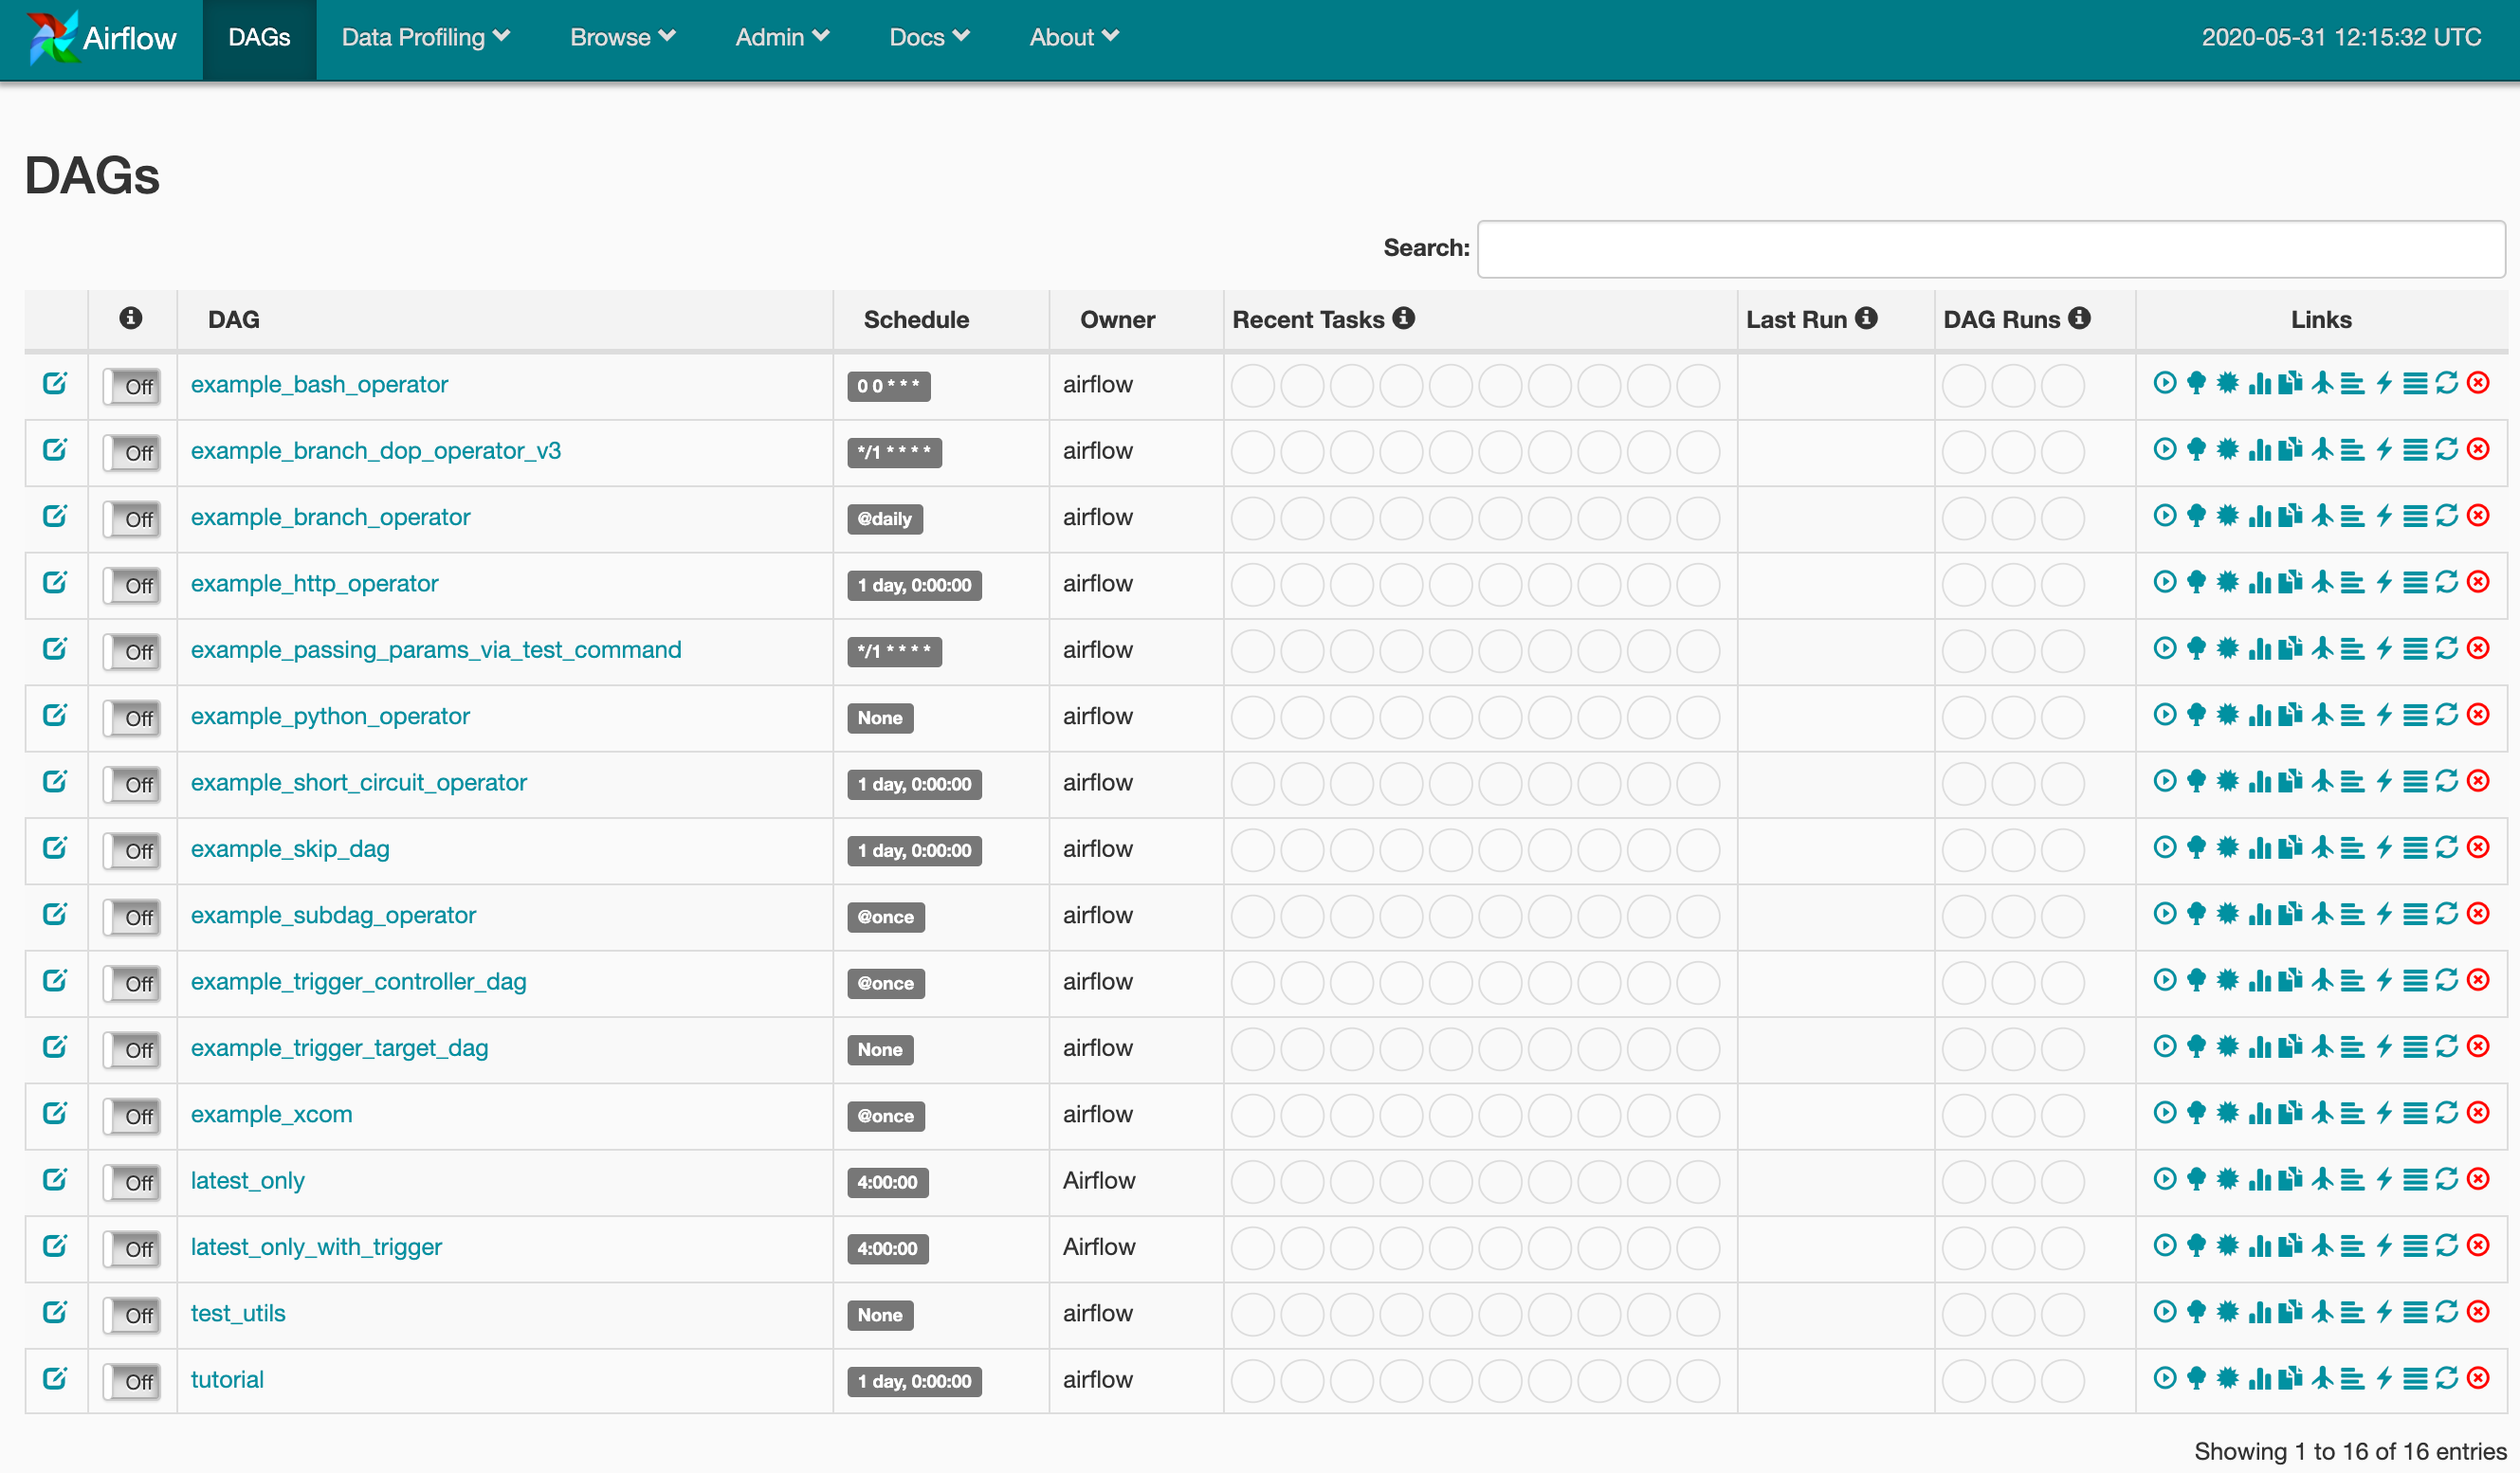
Airflow has a selection of sample dags that appear in the UI. You can hide these by clicking “Hide Paused DAGs” at the bottom of the screen once you start creating your own.
4. Basic CLI commands
Let’s use these sample dags to walk through some common Airflow CLI commands.
Let’s run the sleep task from the tutorial dag.
airflow run tutorial sleep 2020-05-31
We can list the tasks in the tutorial DAG.
bash-3.2$ airflow list_tasks tutorial
Pause this DAG.
airflow pause tutorial
Unpause tutorial.
airflow unpause tutorial
Backfill (perform the tasks on past dates). Specifying the dag_id (tutorial), start_date (-s) and end date (-e).
airflow backfill tutorial -s 2020-05-28 -e 2020-05-30
For a full list of CLI commands see this page in the documentation.
5. The Web UI
We can monitor, inspect and run tasks from the web UI. If we go back to the webserver we can see the effect of the CLI commands we have been running on the tutorial DAG. To make it easier to view I have hidden paused dags.

There are a number of ways we can inspect the running of DAGS.
If we select the tree view.

We can easily view which tasks have run, are running or have failed.
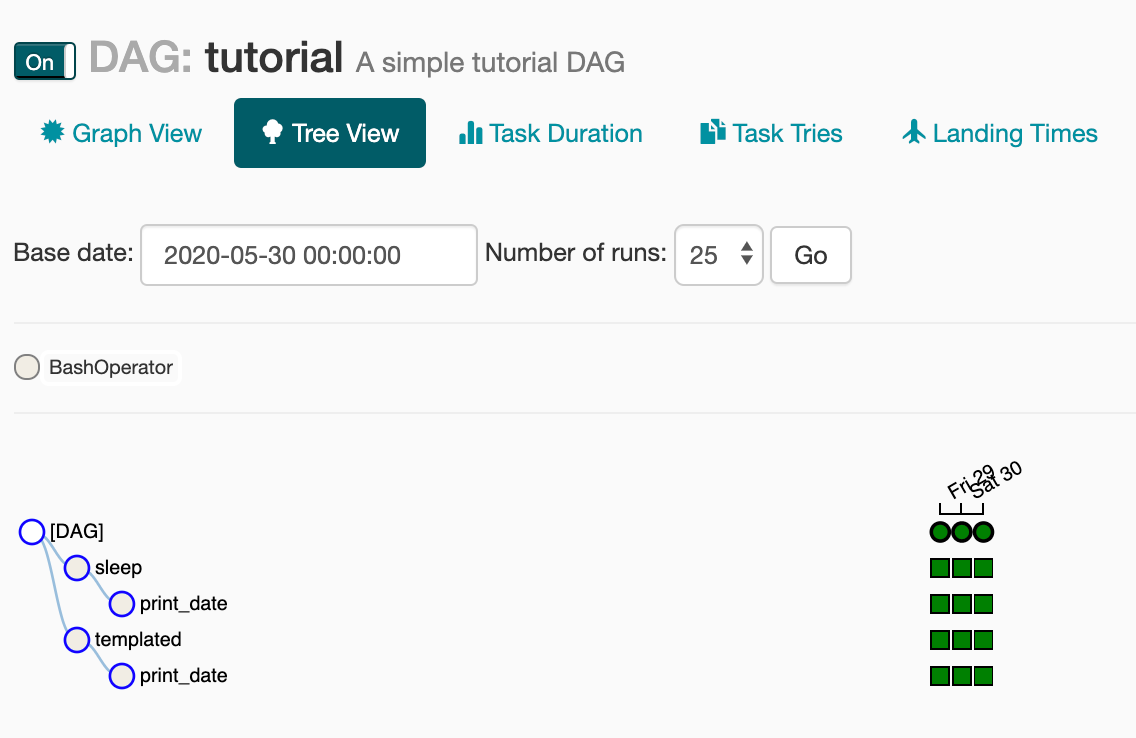
We can also run, clear or mark specific tasks from here by clicking on the small squares.
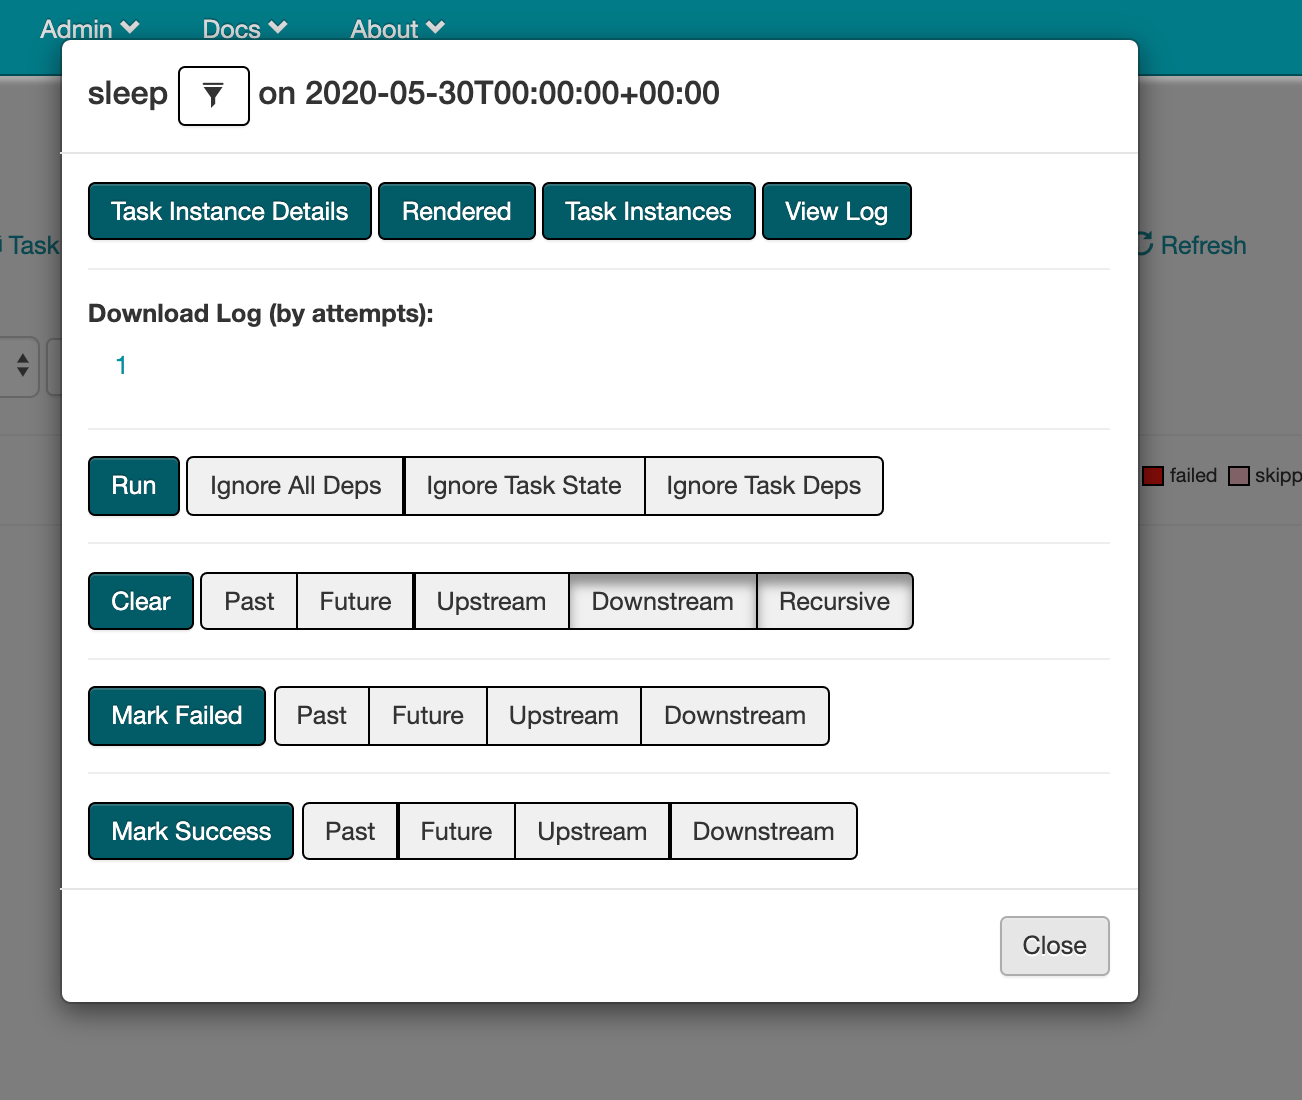
If we click on the Rendered button we can view the code or command that has been run.
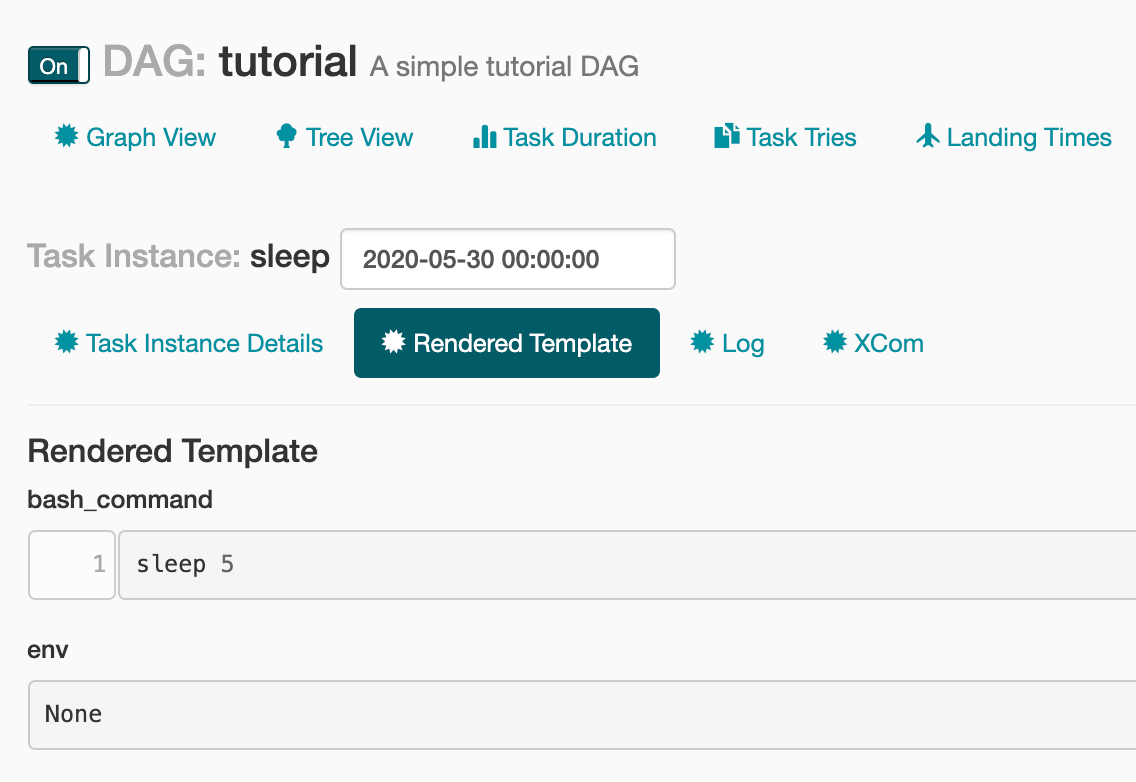
The Code view lets us see the code that makes up the DAG.

The Graph View is a nice way of visualising how the tasks are ordered or related.
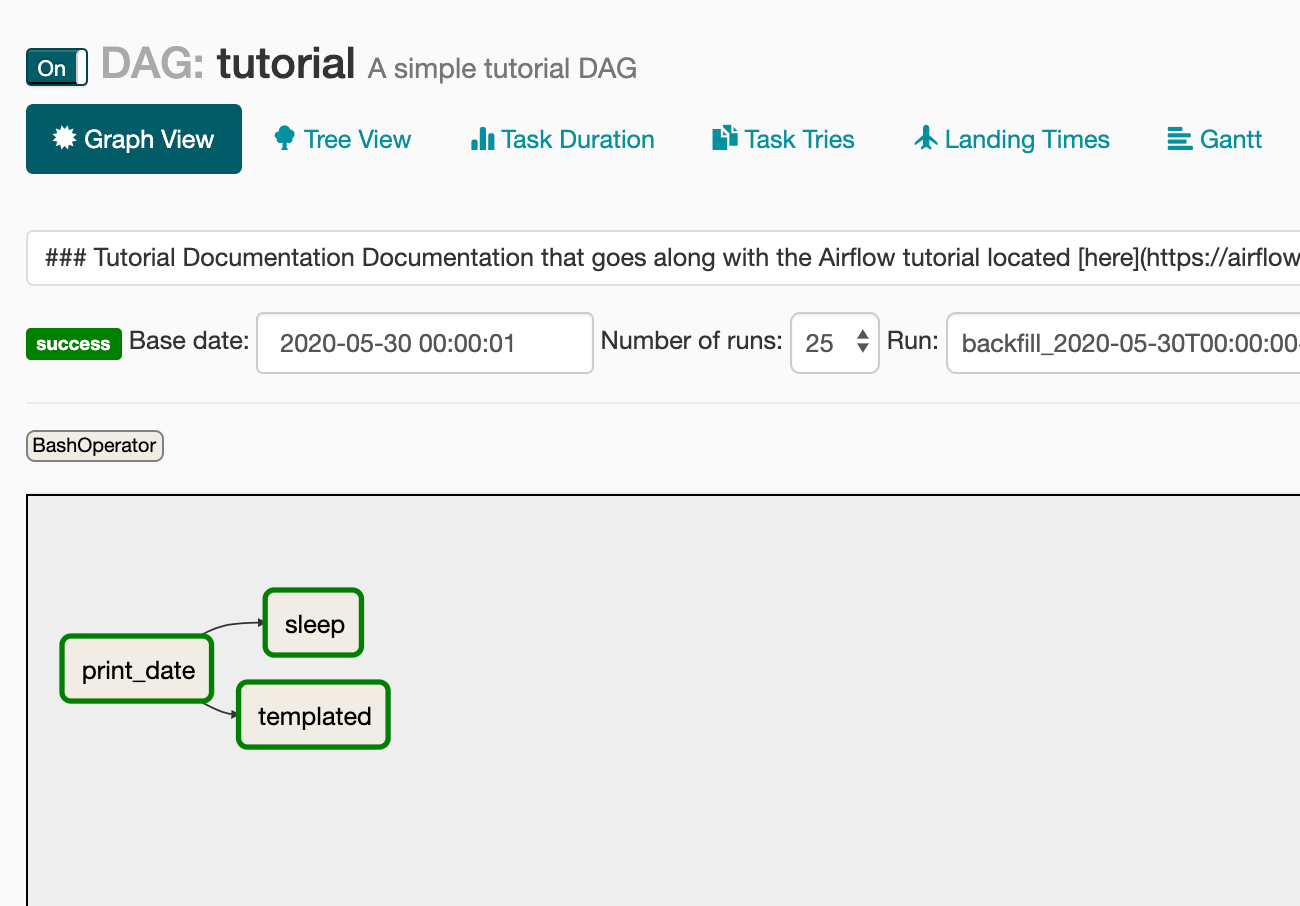
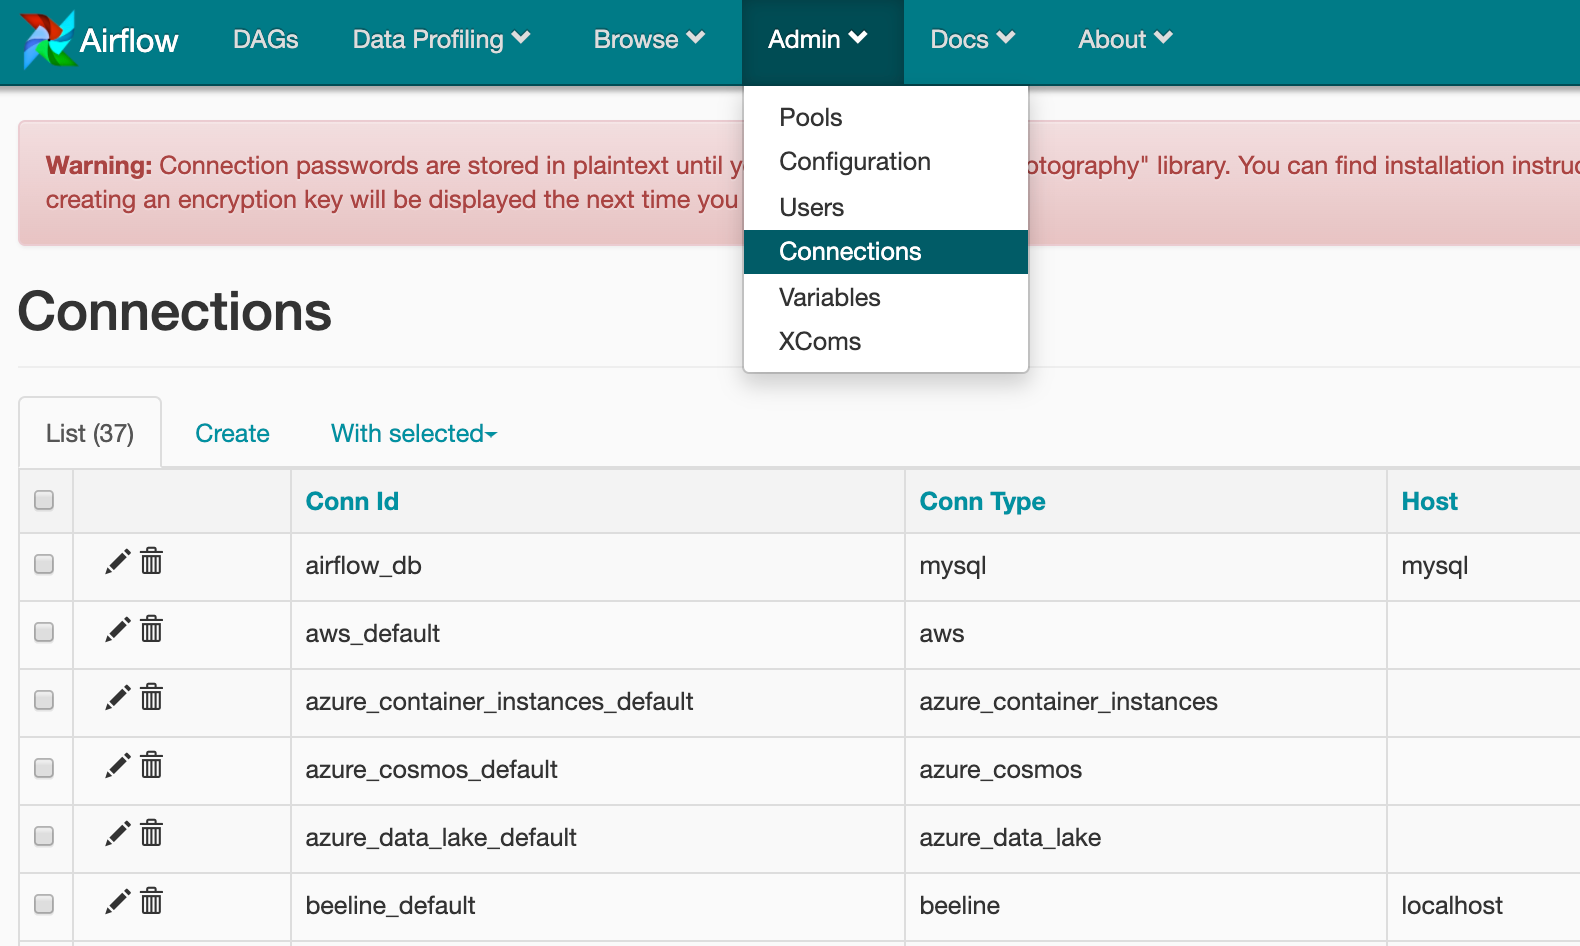
Another important area in the web UI is Admin. Here you can define connections to other platforms such as databases and define reusable variables.
6. A first DAG
I will try to give a close to real-world DAG example here to illustrate at least one way to use Airflow and introduce some of the complexities that come along with this.
I will write an Airflow DAG that first checks if data exists for a date of interest in a BigQuery public data set and then load data on a daily schedule into a table in my own private project.
BigQuery has a free usage tier which allows you to query 1TB of data per month so if you want to try this for yourself then you will be able to do this at zero cost.
BigQuery set up
In order to use Airflow and BigQuery together, we need to first go through some additional set up steps.
To be able to query and load data in BigQuery via Airflow, we need to first give Airflow the required security permissions.
To do this you need to create a service account on the Google Cloud Platform. This is a little like creating a user with permissions to access your account but is designed to allow other platforms access.
First navigate to service accounts from the Google Cloud Console. Then click the create service account button.
Next fill in the displayed form.
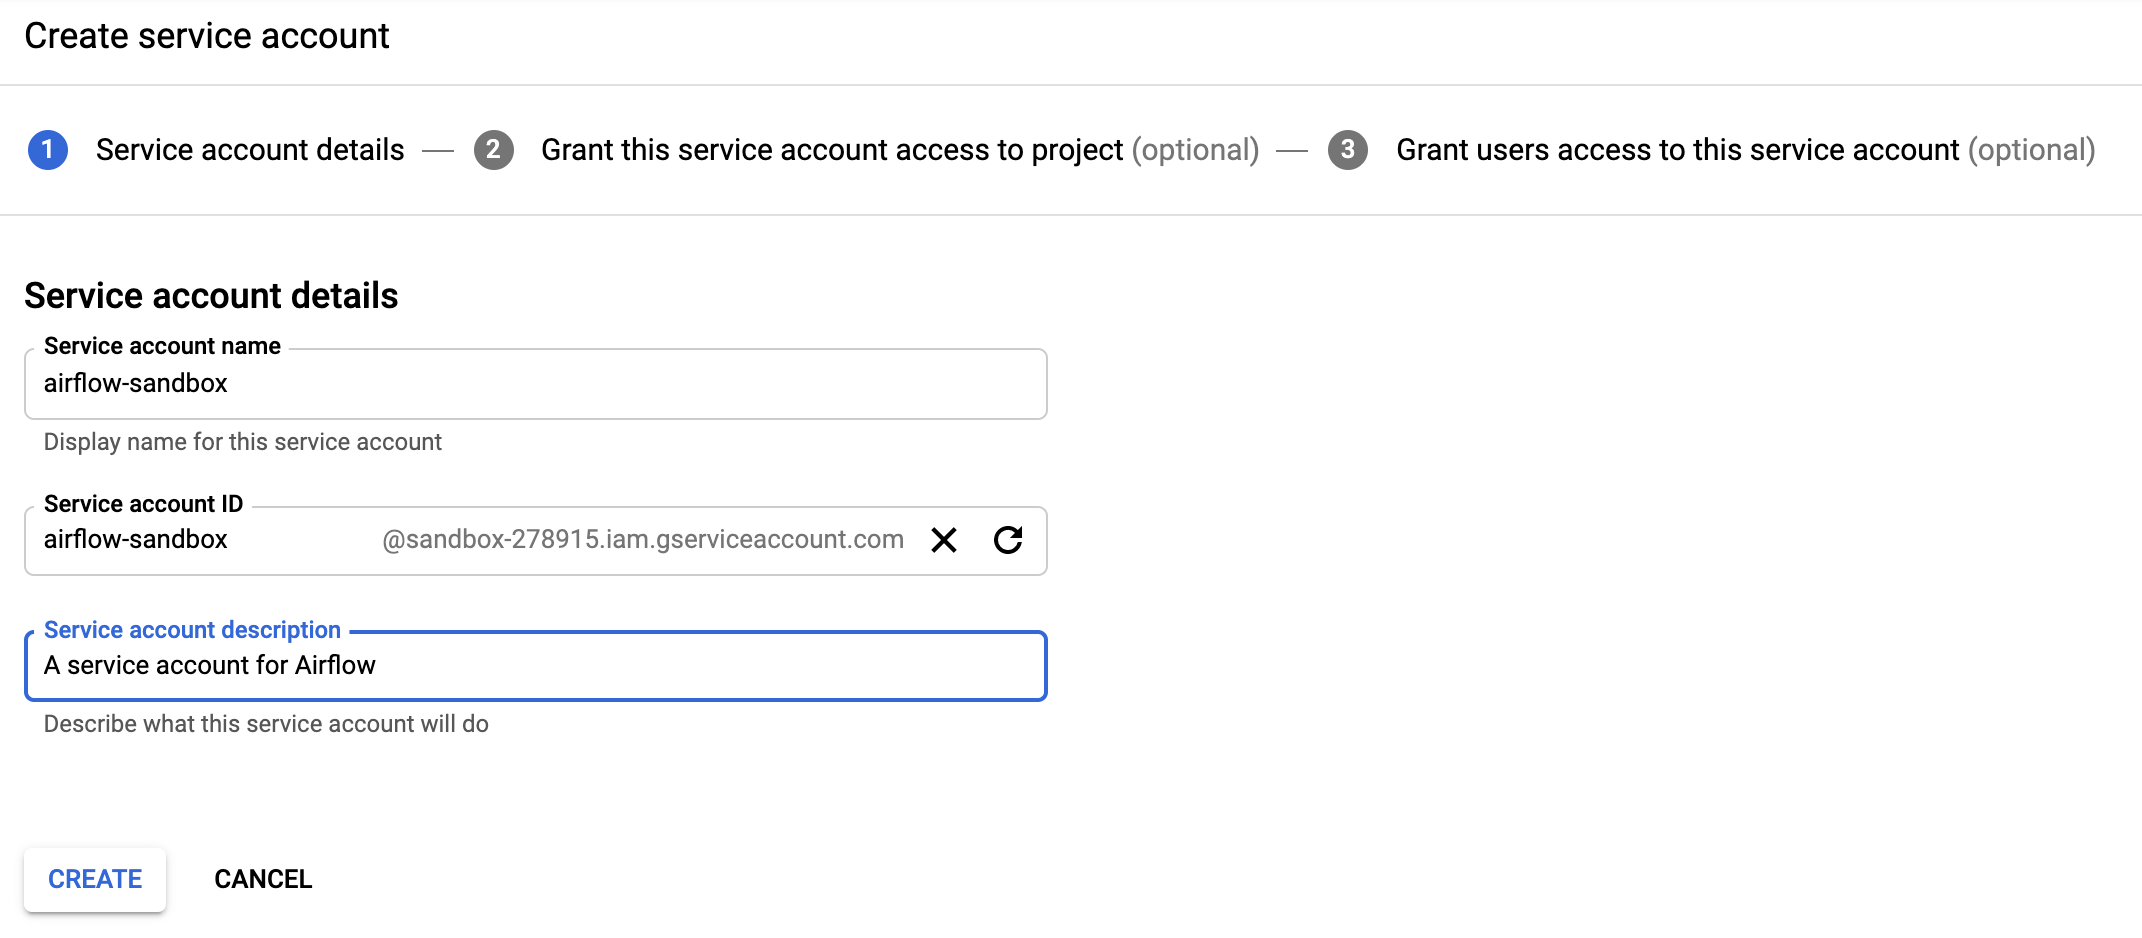
On the next page, you need to select the level of access you want to grant. I have selected editor across all resources as this is my personal account and doesn’t have any sensitive data stored here. If I was more concerned about potential security issues then I would grant more granular permissions.
Next, you need to create a private key which you can do by selecting create key. Choose JSON as this is what you will need for Airflow. The private key will be downloaded to your local system where you need to store it securely.
We now need to go back to the Airflow Web UI and update the bigquery_default connection with the output of this JSON file. You will also need to add a default project id as shown below.

We also need to install some Google Cloud dependencies into our pipenv environment. I have installed the following.
pipenv install google-cloud-storage httplib2 google-api-python-client google-cloud-bigquery pandas_gbq
Creating the DAG
Below is the code for the DAG that will perform the steps outlined above. This should be saved as a
.py file in the dags directory we created earlier.
At the top of the DAG are the required imports. Airflow provides a range of operators to perform most functions on the Google Cloud Platform. I have imported the BigQueryOperator, for running a query and loading data, and the BigQueryCheckOperator, for checking if the data exists for a specific day.
In the next part of the DAG we define the dag_args and then create the DAG which gives information such as the dag_id, start_date and how often the tasks should be run. Airflow uses a CRON expression to define the schedule, for more information about these expressions visit this page.
We then define each step as a task, I have defined these as variable t1 and t2. These tasks each perform a specific step in the workflow. The order in which these should be run is found at the very bottom of the DAG.
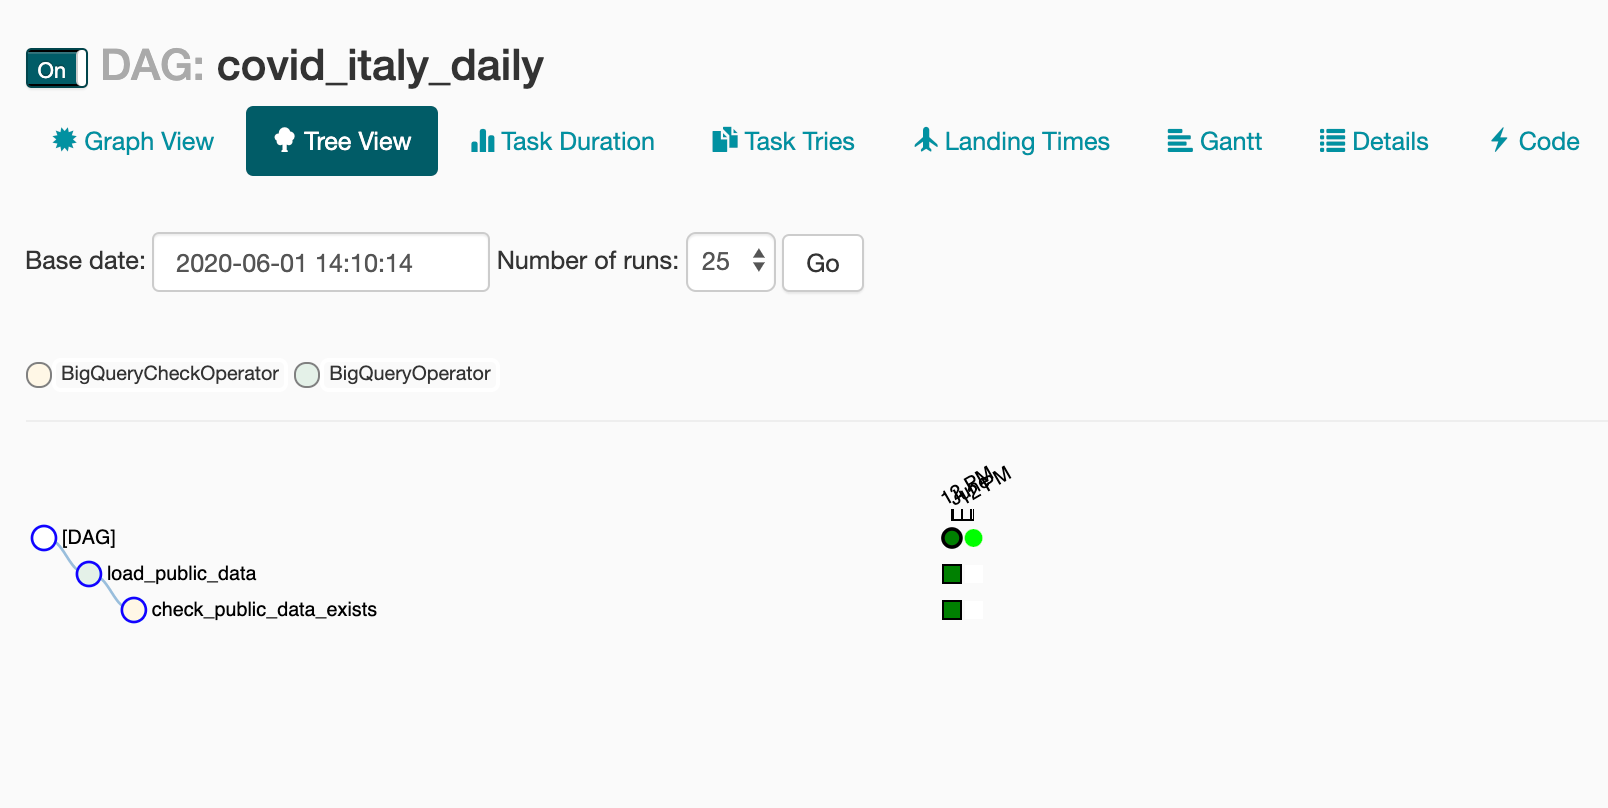
We can now go to the web UI and the DAG runs.
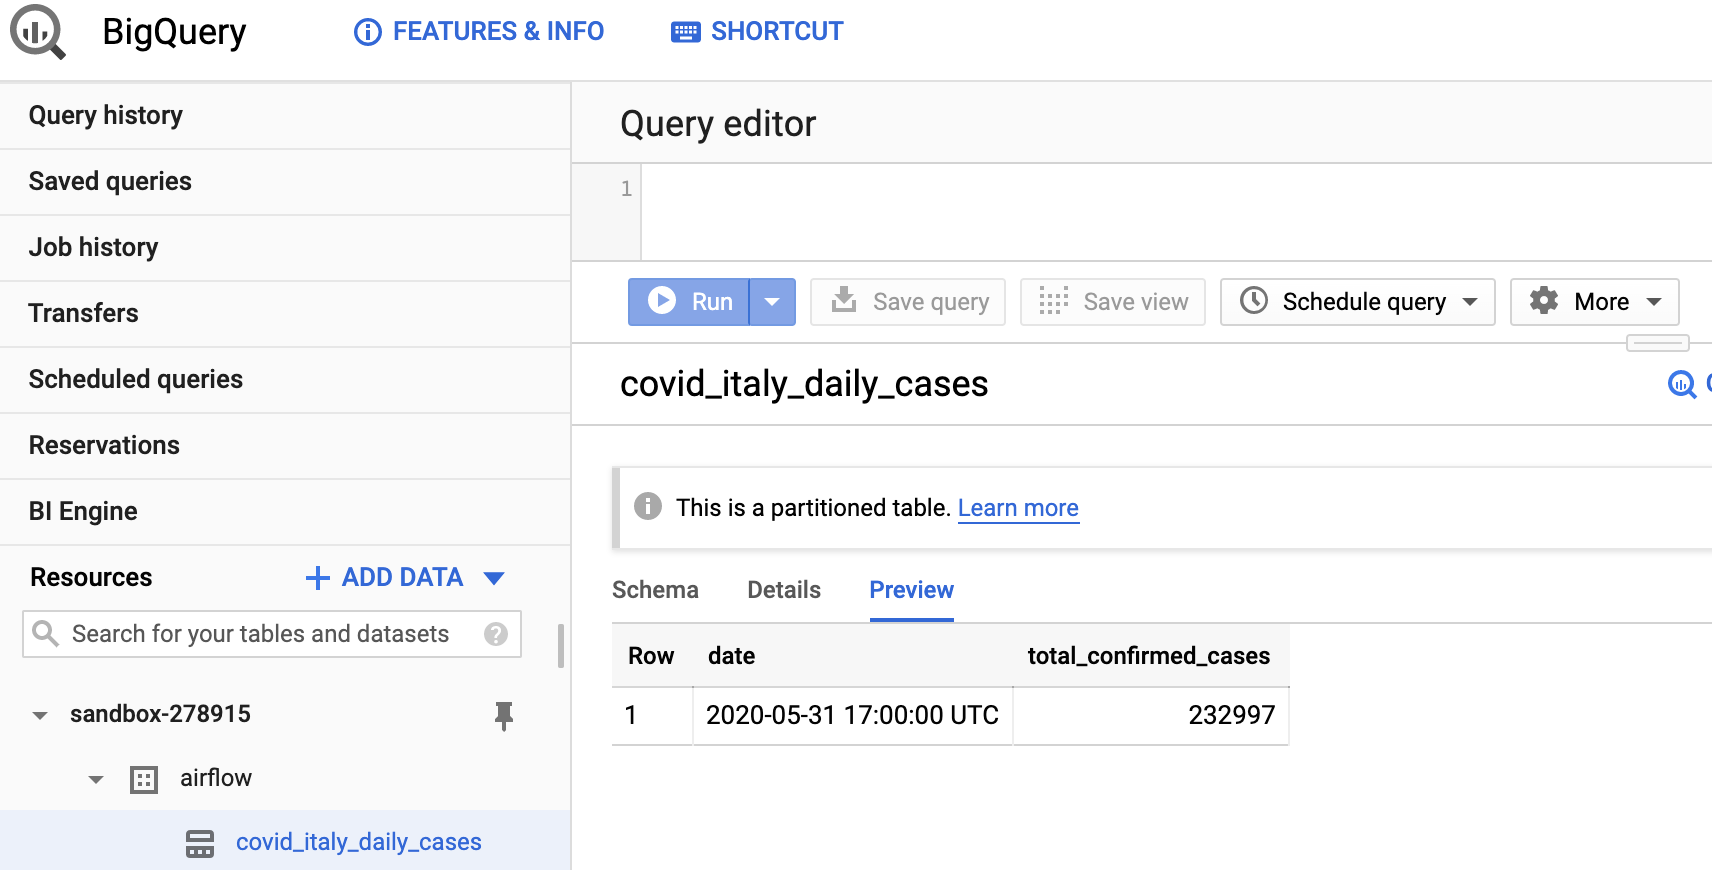
If we go to the BigQuery console we will also see the table that Airflow has created and loaded with data.
This article is designed to be a complete introduction to get your up and running with using Airflow to create a first DAG. For more detailed usage guidelines the Airflow documentation can be found here.
The link to the full project detailed in the article can be found in this Github repository.
Thanks for reading!


No comments:
Post a Comment