AWS Architecture in Motion: Creating Animated GIFs
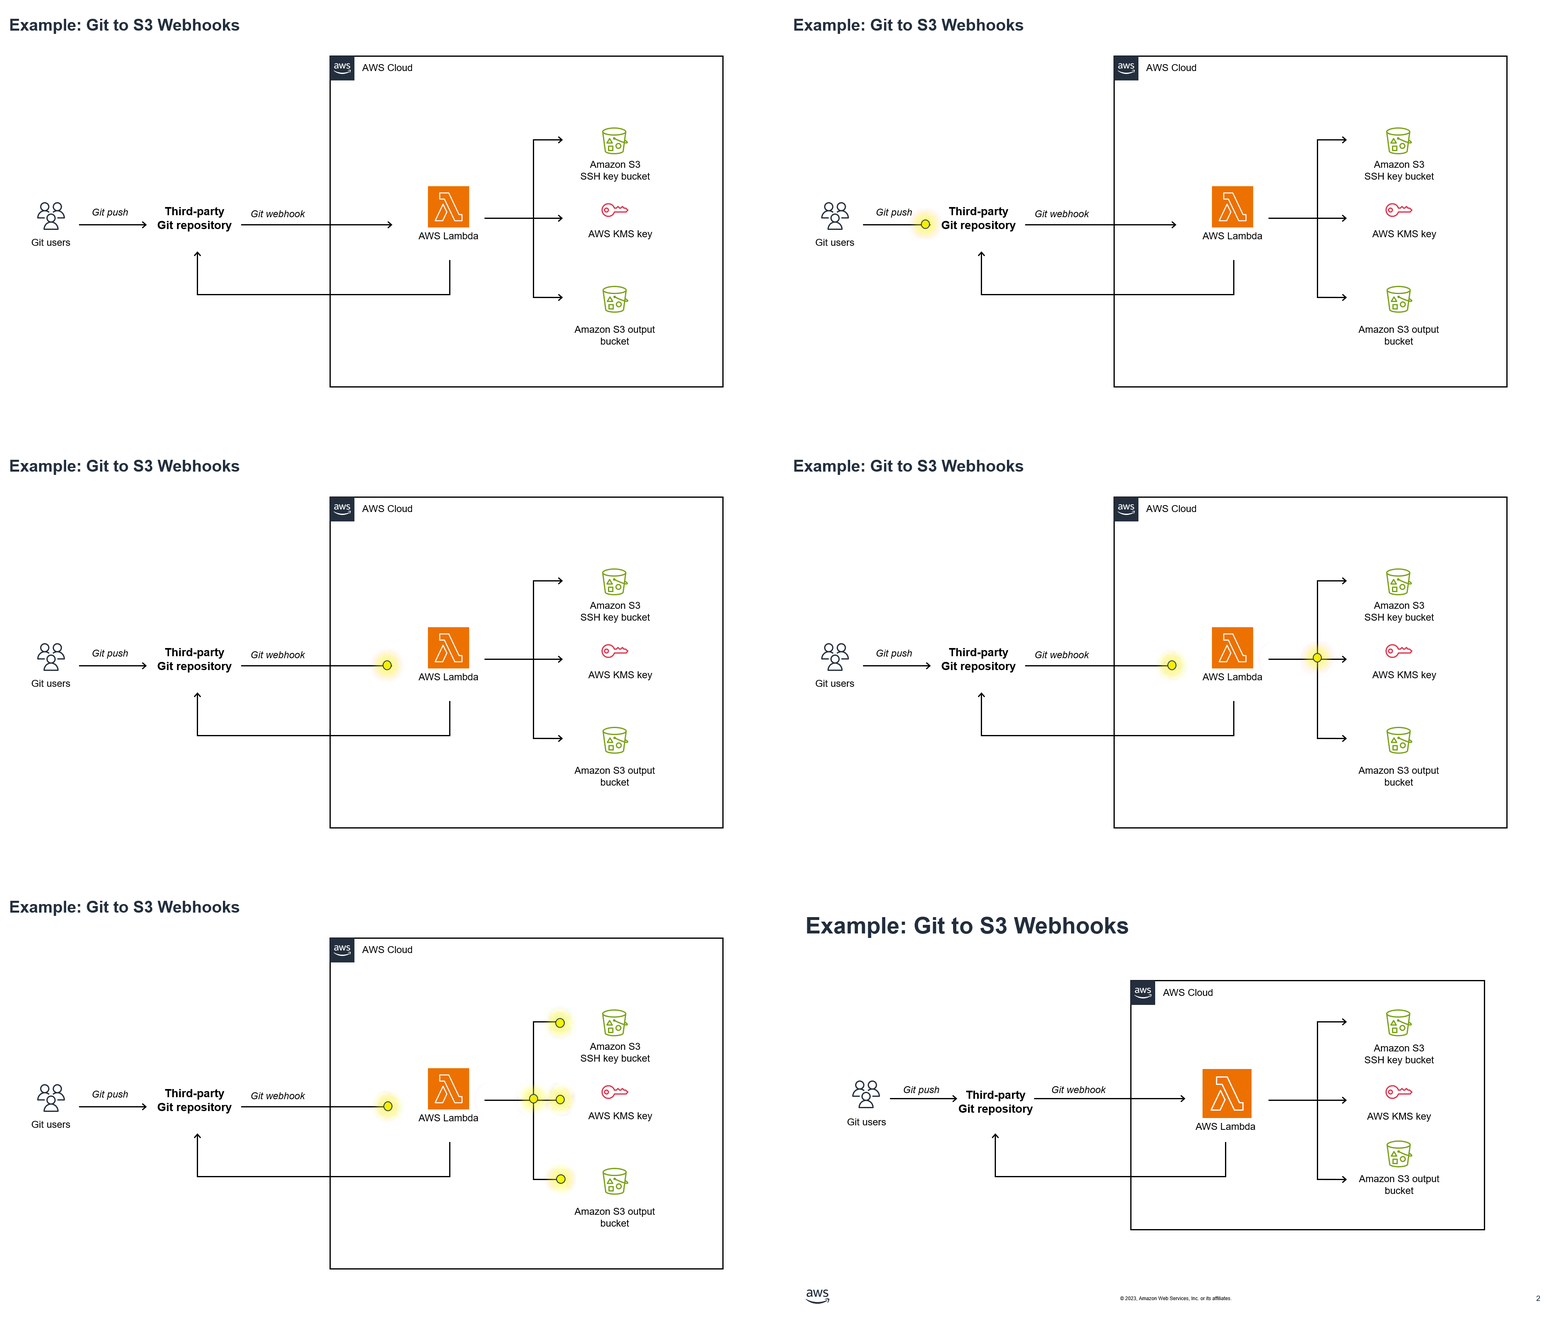
Several days ago, I saw on LinkedIn a great article by Ankit Jodhani concerning one of his projects, and his architecture diagram impressed me. There was one common question in his post: “How did you do it?”. All the people were referring to their diagram not being static, it had animations.
In this guide, I’ll try to provide a step-by-step guide on how to make your own animated AWS architecture diagrams using PowerPoint and GIFs.
GIFs make the diagrams more interactive and help visualize how infrastructure behaves. I hope this will encourage you to learn and develop more skills.
Some key benefits of documenting architecture with diagrams are:
- Visualize infrastructure clearly and organized.
- Identify how components communicate with each other.
- Detect failure points or bottlenecks in the design.
- Explain architecture to new team members.
- Make changes and updates to infrastructure. Let’s get started!
Prerequisites
Basic knowledge of AWS core services (EC2, VPC, S3, etc.)
PowerPoint installed on your computer
AWS Icons plugin for PowerPoint (link to download)
Imgur's account to host GIFs (or any other image hosting site) Link
Basic PowerPoint skills:
Inserting shapes and icons
Aligning and organizing objects
Basic PowerPoint skills:
Inserting shapes and icons
Aligning and organizing objects
Uploading files
Copying image URLs
Using
<img>tagText editor or blog platform to create the post Having these skills and accounts setup will ensure you can easily follow along with the tutorial. The goal is for someone with a beginner-level understanding of AWS and PowerPoint to be able to create animated architecture diagrams by the end.
Bringing AWS Diagrams to Life with PowerPoint Animations
Click on the AWS share link to download the file.
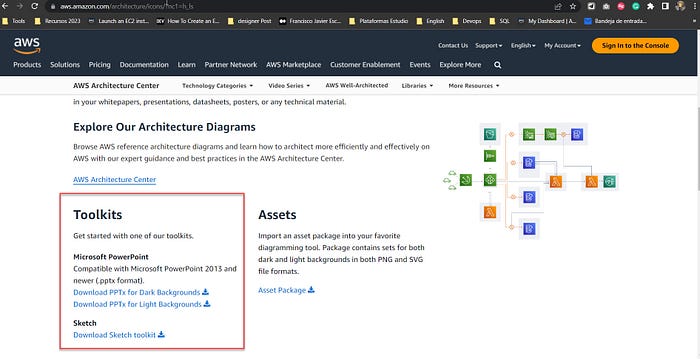
Open the downloaded file in your PowerPoint:

When you open the file in PowerPoint, you will have access to all the instructions and all the icons with which you can make your diagrams:

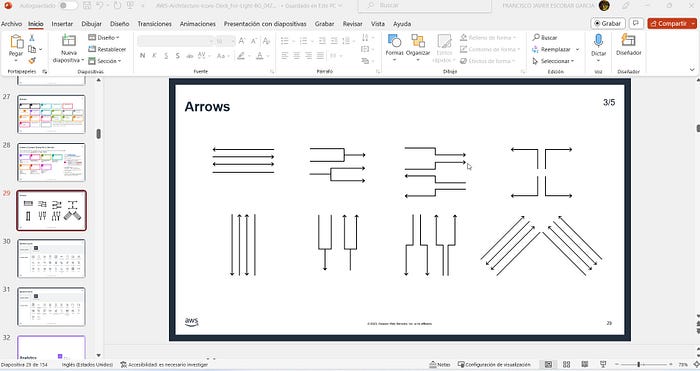
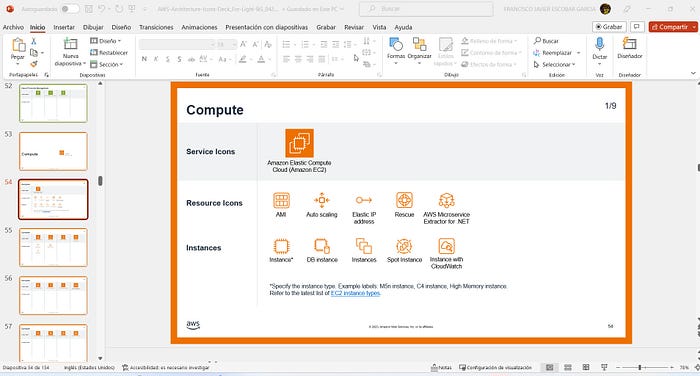
In the file you will also find some examples, I will use the first one for this tutorial: (Git to S3 Webhooks):
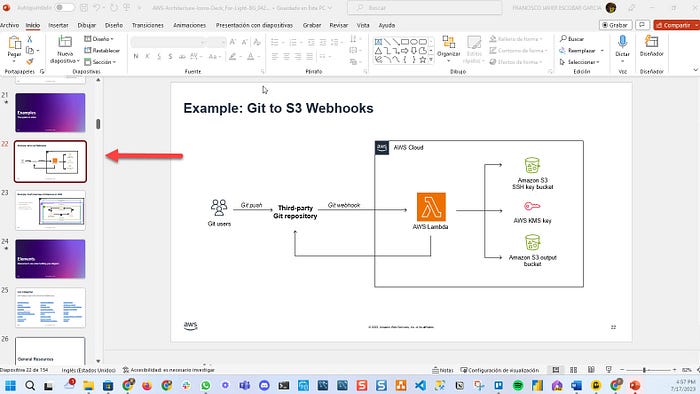
The next step is to copy and paste the necessary icons for your diagram according to the project you will be working on:

Then, in “Insert” you add a format, in this example, we will use a “Circle” which you will find in “Forms” Then in “Flowcharts”
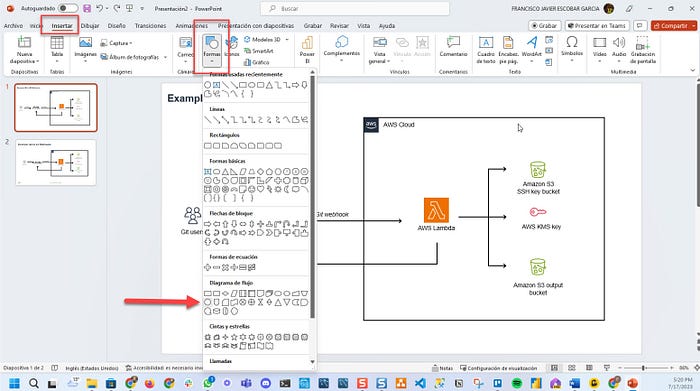
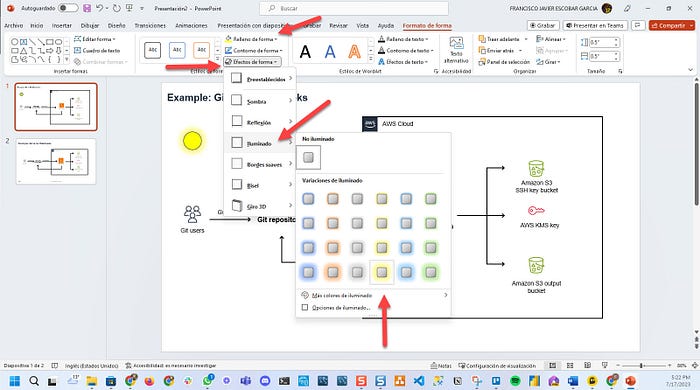
Once selected, you assign a color to it in “Shape Fill” and in “Shape Effects” you add an effect, in my case “Illuminated”:
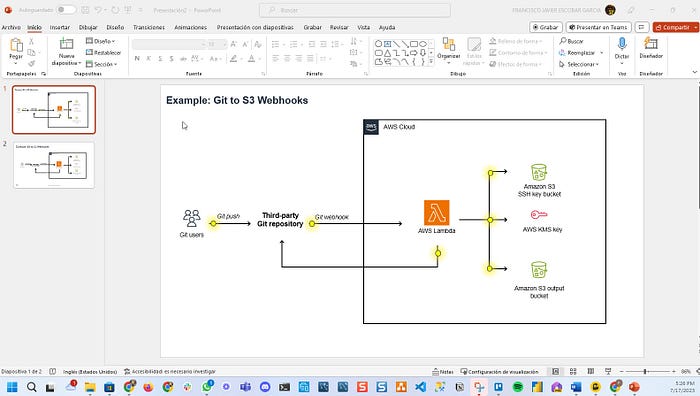
Then, Copy and paste your shape to each position where you want it to move.
You should open the Animation panel and add a shape exit animation. As a result, they will disappear once the Movement has ended.

In order to maintain consistency, I also choose “Fade” for the exit animation. Make sure to click “Fade” on the red side as it represents output, while green is input. After that, arrange your animations in the Animation panel according to their sequence.

Select “Add Animation” for each point. Then, select the “Custom Path” option under Motion Paths. Check the Animation panel to make sure these paths are in the right order.
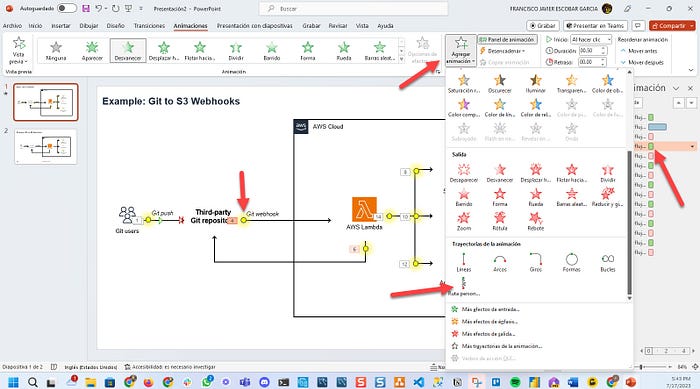
It is necessary to position yourself on each icon in order to add the animation trajectory.
When multiple animations need to start at the same time, select them all and select “Start with Previous”. The animations should also be arranged in the following order: first green (entry animation), then blue (motion animation), and finally red (exit animation).
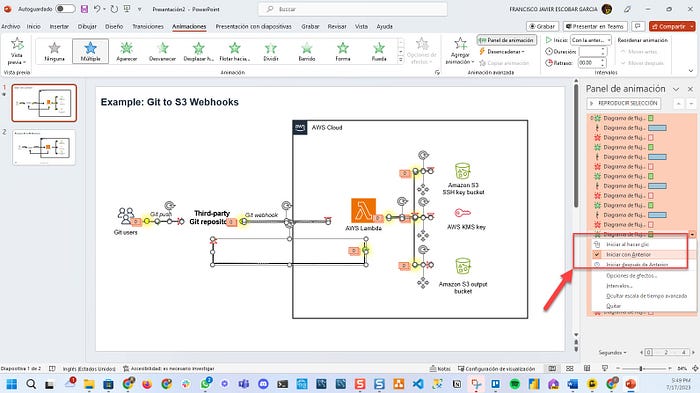
With all the animations set up, play them back to make sure everything looks as expected. If necessary, adjust the order of the animations. Once you’re happy with your animation, export the slide as a GIF.
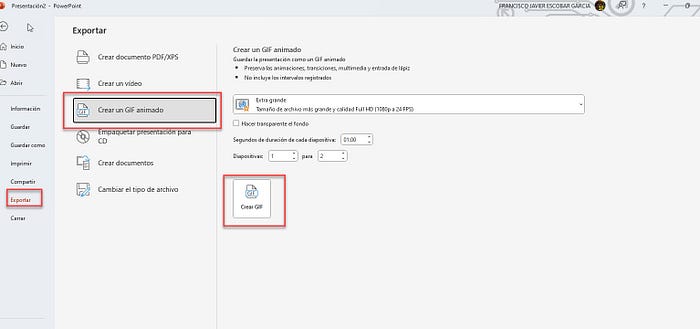

You can take the saved GIF file and upload it to an online service like Imgur.
Then copy the GIF URL and use it in an HTML image tag
<img src="”gif-url”" />If you have access to edit the page code directly, you can embed the image by adding a
<img>tag pointing to the image URL, for example:<img src="https://i.imgur.com/1kTuEtc.png" alt="AWS Diagram" title="AWS Architecture in Motion" width="500" height="300" />If the page has a content editor like WordPress, you can upload the image to the media library and insert it into the page when writing the post. The editor will automatically add the
<img>code.You can also upload the image to a hosting service likeImgur, and copy the file URL to then add it in the
<img>tag or through the page’s content editor.Another option is to upload the file to a storage service like Google Drive or Dropbox and generate a public URL for the file to include in the
<img>tag’s src attribute.In summary, you need the public URL of the image to create the
<img>tag pointing to that file. Then you include that code in the page, either by editing the HTML directly or through a content editor.The steps above will guide you through the process of creating your own AWS architecture diagram. Once again, I am very grateful to Ankit Jodhani for inspiring me and so many others on our journey to the cloud.

No comments:
Post a Comment