As I am nearing the finish line on my client facing JET based website, one of the last tasks I had to do was “protect the server”.
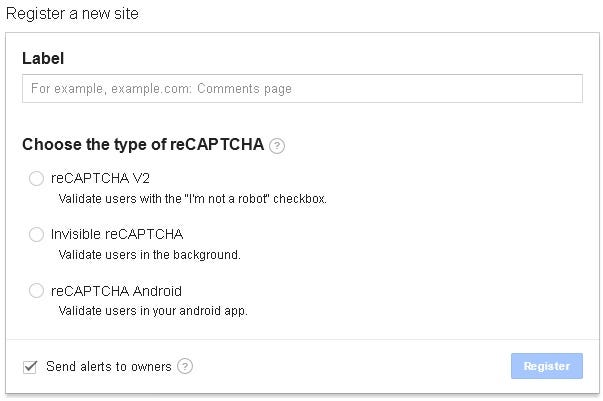
A part of this meant putting a safeguard on my search form so it was not open to abuse from automation. Google reCAPTCHA is perfect for this. Google now uses an invisible mode too now which means its less obvious a user has to do anything at all.
Google reCAPTCHA
If you head over to https://www.google.com/recaptcha/ you can create your API key.
This is exactly like it has been for years so no change here…apart from one thing: Invisible reCAPTCHA

Once you have created your key its time to plug it into JET.
Using reCAPTCHA in Oracle JET
Adding in the URL as a library
Firstly we need to add reCAPTCHA into the require paths so we can call upon it when required. So within your main.js file:
$projectRoot/src/js/main.js
Add the following inside the paths: object, like so:
paths:
//injector:mainReleasePaths
{
‘googlerecaptcha’:’https://www.google.com/recaptcha/api.js?onload=onloadCallback&render=explicit',
‘knockout’: ‘libs/knockout/knockout-3.4.0.debug’,
‘jquery’: ‘libs/jquery/jquery-3.1.1’,
‘jqueryui-amd’: ‘libs/jquery/jqueryui-amd-1.12.0’,
‘promise’: ‘libs/es6-promise/es6-promise’,
‘hammerjs’: ‘libs/hammer/hammer-2.0.8’,
You’ll notice that we are using the explit method of attaching reCAPTCHA to the page which caused me some serious pain when trying to figure all this out. It might be prudent at this time to add it to the release paths if you are using it (which you should!)
Using reCAPTCHA in your Model
Here’s where my fun began. Google reCAPTCHA, by default, wants to bind to a button or div with the class
g-recaptcha and essentially bind to it. However, in a Single Page Application (SGA) this cannot happen as your view model runs before your view. This is why we usedrender=explit earlier on.
We also supplied another parameter,
onload=onloadCallback. This is so that we can manually handle the reCAPTCHA attachment ourselves.
So, from that, create a function in your view model which implements the onload functionality of reCAPTCHA:
onloadCallback=function(a){grecaptcha.render('submit', {
                      'sitekey'  : 'YOUR_API_KEY',
                      'callback' : onSubmit
                  },true);
}
This will attach the running of the reCAPTCHA code to an element with an id of
submit. A callback method onSubmit is also supplied which will be invoked once reCAPTCHA has completed.
To replay that back, when I click my form submit button (with an id of ‘submit’), reCAPTCHA will run and do the automatic checks to see if I am a robot. If this works successfully then
onSubmit will be invoked which passes in as a parameter the generated token which is used for server side verification. If reCAPTCHA deems I am not a human, I get the challenge which at the time of writing means choosing squares which have a certain object in.
To finish off the model code, the
onSubmit method looks like this:onSubmit=function(token){ console.info("google recatpcha onSubmit",token) //do validation/application code using token }
so the reCAPTCHA
onSubmit function is now your entry point into your application.
View Code
Within the model we attached the reCATPCHA to a button of id submit. Here is that definition:
<button id=”submit” data-bind=”ojComponent: {
component: ‘ojButton’,
label: ‘Send’}”/>
You’ll notice there is no click event handling here. That is because the reCAPTCHA bind is doing all this for us.
Where to go From Here
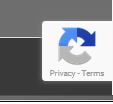
When running your application you should see the reCAPTCHA banner on the bottom right of your application which tells you its loaded correctly. If you do not see this then check your console; it maybe your API is not allowing your domain.

You should now extend the
onSubmit method to invoke your application code, making sure to send the token to your server where you can verify it. You should not do any work on the server until that token is verified.
My backend verification looks looseley like the following (NodeJS):
var data = {secret: grecaptcha, response: recaptchaToken}
  request.post({
       url:"https://www.google.com/recaptcha/api/siteverify",
       form: data})
  .then(function (e){
      //recaptcha service called...check result
      var resp = JSON.parse(e);
      if (resp.success == false){
        console.info("recaptcha token outcome is false")

      } else {
        console.info("recaptcha token validated")
      }  })
The data of the request contains two params:
secret and response. The secretis from your API account within Google itself. The response is the token you received from the onSubmit call from the front end which should have been passed into your API.
What we are doing here is asking Google to verify that the given token was valid and not made up. Otherwise any bot could pass in a token and call our API.
Takeaways
It’s easy to get things wrong with the invisible reCAPTCHA but once implemented gives you some protection against programatic attacks/bots and therefore saving your API.
— Jason Scarfe :: Griffiths Waite


No comments:
Post a Comment