The Problem
No matter where you work, documentation is neglected, disorganized, hacked together, and therefore, can definitely be improved.
While working for the world’s largest custodian bank, I have seen various ways of authoring and publishing documentation. Specifically in the technology sector of my bank, most employees use Atlassian’s Confluence wiki to publish something to the internal user community.
However, the issue with wikis, especially when it comes to authoring procedural information, like tutorials, the material can come off quite mundane. When users navigate to a wiki that's longer than a three-minute read, it seems any of the following happen:
- user loses interest within the first 30 seconds
- user gets lost in a chaos of words
- user feels discouraged since the material presented looks more complex than it actually is
- author has wasted time, since the user abandoned the article
The Solution
In order to keep users engaged and feel empowered, developers need to revamp the way they author tutorials. So, I decided to look for a better authoring/publishing platform, other than a wiki.
Now, who better to draw influences from, if not Google 😎.
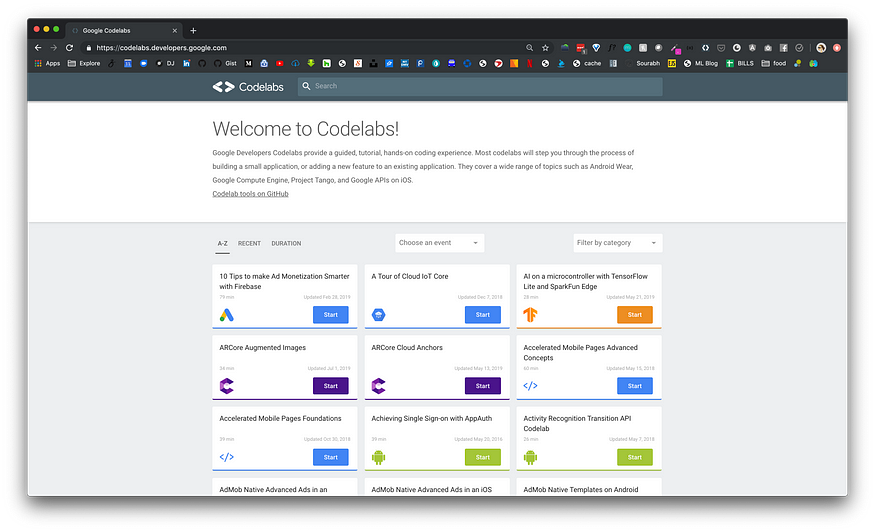
Google launched a portal that houses community-driven tutorials in the form of what they like to call, a codelab. The official site is: https://codelabs.developers.google.com


Now let's compare that to a Confluence wiki:

It's safe to say that a codelab is much more inviting. So, I decided to replicate exactly what Google did. As they say…
Imitation is the sincerest form of flattery :)
The Execution
The first step was getting my environment setup so that I can test this out myself. Let's do that.
Install Software
- Go language
- Node.js v10+ and npm
- claat (open source command line tool maintained by Google)
Configure Go Environment
After you install Go, add the following to your bash_profile:
## not required if you’re only using Go modules
export GOPATH=$HOME/go
export GOROOT=/usr/local/go## required
export PATH=$PATH:$HOME/go/bin
Manage claat
Download the binary and move it to the $HOME/go/bin directory. Double check if you have execution privileges on that binary. If you are not sure, run the following command in the same directory the binary is in:
chmod u+x claatSetup the Landing Page
The codelabs landing page was generously developed by a group of people and has made its way to GitHub. All we have to do is clone the project:
git clone https://github.com/googlecodelabs/toolsOnce you have the project cloned, go into the site folder and install all the dependencies:
## navigate to folder
cd site/## install dependencies
npm install
npm install -g gulp-cli
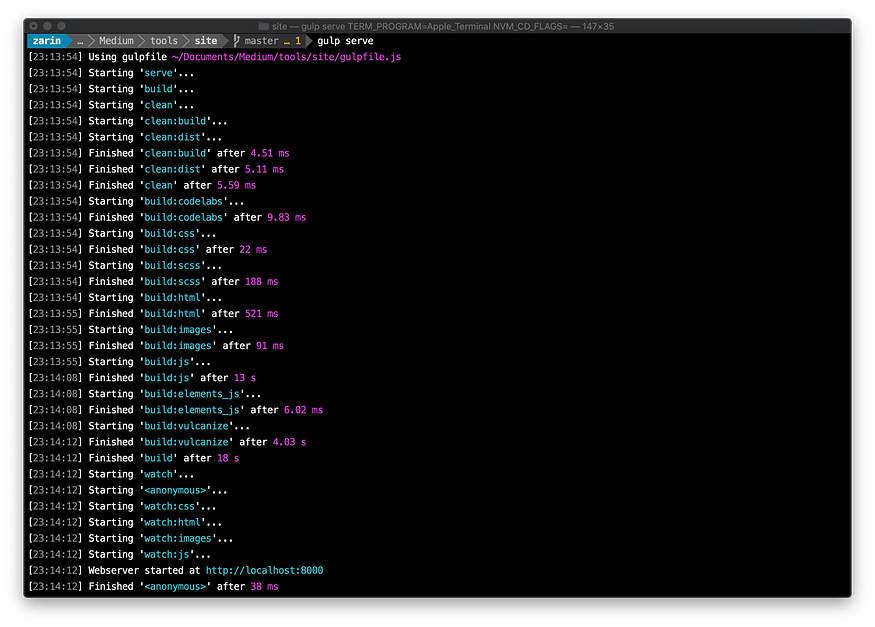
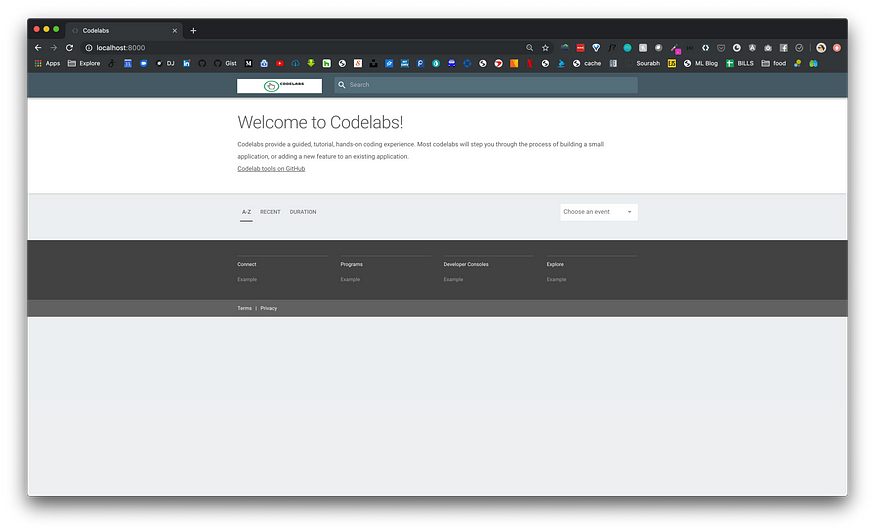
To serve this site in development mode, run the following and you should see your server running on http://localhost:8000 by default.
gulp serve

Now that we have setup the landing page, let’s write a codelab.
Write a Sample Codelab
The wonderful part about writing a codelab, is that you do not have to suffer through writing this out in HTML. You have your choice of either markdown or a Google Doc. For logistical reasons I had to use markdown since the word docs had to be published on Google Docs, and again, I work for a bank, so that was not going to happen.
The best way that I can show you the power of a codelab is just by giving you a sample markdown file and showing you almost every possible item you can display.
First, let’s start by creating a codelabs directory under the site directory. Then create an assets folder within the codelabs folder, so that you can put any images or additional items in there that you might require for your codelabs.
## create codelabs folder
mkdir codelabs## go into directory
cd codelabs/## create assets folder
mkdir assets
Your folder structure should now look like this:
tools
|-- site
|--|-- codelabs
|--|--|-- assets
In the codelabs folder, create a markdown file with the following name and contents:
File name: how-to-write-a-codelab.md
Contents:
summary: How to Write a Codelab
id: how-to-write-a-codelab
categories: Sample
tags: medium
status: Published
authors: Zarin
Feedback Link: https://zarin.io
# How to Write a Codelab<!-- ------------------------ -->
## Overview
Duration: 1
### What You’ll Learn
- how to set the amount of time each slide will take to finish
- how to include code snippets
- how to hyperlink items
- how to include images
- other stuff
<!-- ------------------------ -->
## Setting Duration
Duration: 2
To indicate how long each slide will take to go through, set the `Duration` under each Heading 2 (i.e. `##`) to an integer.
The integers refer to minutes. If you set `Duration: 4` then a particular slide will take 4 minutes to complete.
The total time will automatically be calculated for you and will be displayed on the codelab once you create it.
<!-- ------------------------ -->
## Code Snippets
Duration: 3
To include code snippets you can do a few things.
- Inline highlighting can be done using the tiny tick mark on your keyboard: "`"
- Embedded code
### JavaScript
```javascript
{
key1: "string",
key2: integer,
key3: "string"
}
```
### Java
```java
for (statement 1; statement 2; statement 3) {
// code block to be executed
}
```
<!-- ------------------------ -->
## Hyperlinking and Embedded Images
Duration: 1### Hyperlinking
[Youtube - Halsey Playlists](https://www.youtube.com/user/iamhalsey/playlists)
### Images

<!-- ------------------------ -->
## Other Stuff
Duration: 1
Checkout the official documentation here: [Codelab Formatting Guide](https://github.com/googlecodelabs/tools/blob/master/FORMAT-GUIDE.md)
In the assets folder, add a JPEG image and rename it the image: puppy.jpg. This is just for demo purposes.
Once you have your markdown saved, you now want to export it to HTML using the claat tool. In the codelabs directory, run the following command to do just that:
## go into codelabs folder
cd codelabs## export md to html
claat export how-to-write-a-codelab.md

When you export a markdown, claat will generate a folder based on the id of that markdown file, which you specified in the metadata at the top of the sample markdown shown above. Each time you modify the markdown file, you must export it, in order for changes to be propagated. Your new filesystem should look something like this:

Now that you have written your first codelab, you want to be able to see this displayed on the landing page. Kill your initial session that was running your application and this time, in the site directory, run the following command:
## go back to site folder
cd ..## re-run command
gulp serve --codelabs-dir=codelabs


It’s important to note that the UI is responsive and mobile friendly, so landing pages and codelabs look and work well not just on desktops, but on phones and tablets as well.

We are almost done. Let’s add some color to this page and make sure we categorize this new codelab as a Sample.
Categorize Codelabs
Under /site/app/styles there is a file named _categories.scss. Open that and add your own entry at the bottom, if you would like to create a new category, the way I am about to. I have added the following:
@include codelab-card(['sample'], #FC0023, 'sample.svg');Then, I went to flaticon.com and searched for the word "Sample” and downloaded the svg of a test-tube, since that is what popped up in my search results 🙂. I renamed the svg to sample.svg and added it to /site/app/images/icons directory.
Once again, I kill my running session and run the command again:
gulp serve --codelabs-dir=codelabs
However, you do not see your codelab under any category called “Sample”, do you 🤔?
Try this:
- copy your initial markdown
- rename the file
- rename the
id - change the
categoriesto “Web” - export the new markdown using
claat - kill and start a new terminal session
You should now see another drop-down to filter based on Category on the UI:

Note: Only if you have more than one category to filter by, will the drop-down be populated.
Create Multiple Homepages (Views)
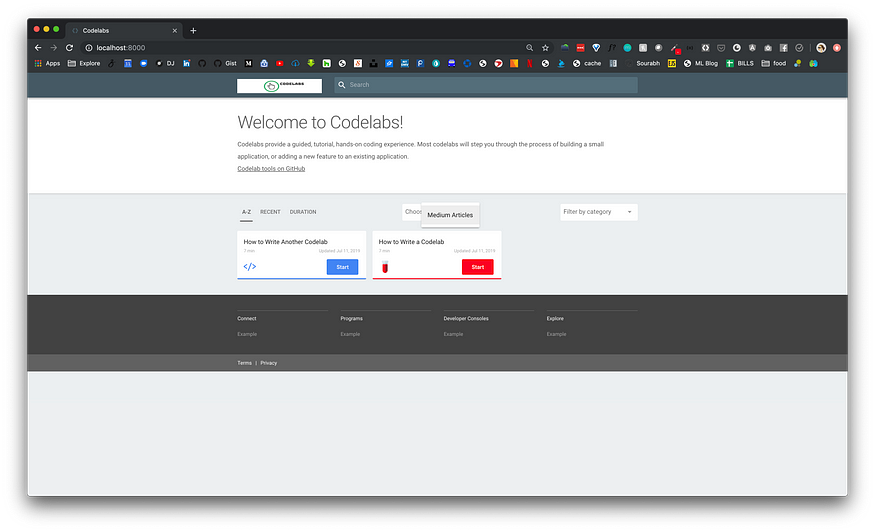
Now for one last thing. If you click on the “Choose an event” drop-down, you will see “Visual Studio Live”. This is called a view and, if you navigate to it, you will see the URL change to: http://localhost:8000/vslive
If you want to remove or modify that view, simply go to the site/app/views and either delete the vslive folder or modify it to something more appropriate. Lets modify the vslive folder and create a view called medium.
Your folder should now say medium and the contents of the view.json within that folder should have changed to:
{
  "title": "Medium Articles",
  "description": "Hosting codelabs that have been used to write Medium articles",
  "logoUrl": "/medium/medium.png",
  "tags": ["medium"],
  "exclude": [
    ".*-about$",
    "^lang-.*"
  ]
}
I found the Medium logo in PNG format online and saved it under the medium folder. Notice that logoUrl has updated with the correct image.
In order to have codelabs appear under a certain view, you must add one more metadata tag at the top of your codelab. It’s called the tag attribute. Your markdown metadata should look like this now:
summary: How to Write a Codelab
id: how-to-write-a-codelab
categories: Sample
tags: medium
status: Published
authors: Zarin
Feedback Link: https://zarin.io
Repeat the same process:
- save your codelab
- export your codelab
- restart your session
- navigate to localhost


The Response
After all of that, I launched this internally at my workplace and marketed it for some time. After gathering some feedback on the actual content of the codelabs, this type of platform used to deliver technical content was much more affective and intuitive, rather than showing someone a wiki.
This was not just an experiment to see how people would take to the new style of tutorials, but it was also my attempt to change the culture at a 235-year-old banking institution.
Publishing Codelabs
Since I work in an environment that limits code sharing, I could not publish any codelab to the external user community. However, Google has a process in which you can submit a codelab that you have written to be added to their official developer website, as shown above in the intro.
You can follow the steps written here: Publish Codelabs to Google Codelabs
Next Steps
Now that I have built and deployed this platform, I am…
- working on adding Google Analytics (some analytics have been built in by default) to each codelab to see which ones are actually useful vs which ones could be improved.
- automating the builds so that each time a user adds a codelab, the web app is compiled into a productionized app, and that app is auto-deployed to our private cloud platform.
If you would like to clone this repository, you can find it on my GitHub 🤓
In my next post, I will explain how to setup a CI/CD pipeline to build and deploy this web app to a cloud platform.
Lastly, I would like to say thank you to Marc Cohen for his technical guidance!
No comments:
Post a Comment