Sometimes you need something with more grunt than a basic laptop. So why not run develop and test your application in the cloud?
And at other times you just wish all the tools you need are installed for you. Everything from Java to MySQL is pre-installed in the Oracle Linux Cloud Developer image.
The Oracle Linux Cloud Developer has all the tools ready to go. You just need to make a start.
Oracle Linux Cloud Developer Image
Start your Oracle Linux Cloud Developer journey with a VNC connection.
Setup the server for VNC
The image of the Oracle Linux Cloud Developer has a number of components already installed. To list these run the following:
# list the installed groups
dnf group list --installed
dnf group list --available
‘Server with GUI’ is already pre-installed into Oracle Linux Cloud Developer. This means we are ready to go with a GUI. The GUI is going to be the Gnome desktop.
In addition, the ‘tigervnc-server’ VNC server software is also pre-installed into the Oracle Linux Cloud Developer image.
As we will use Xorg for VNC, we will ensure that the setting for Wayland is disabled.
# already setup in Oracle Linux Cloud Developer
vim /etc/gdm/custom.conf
Fortunately, ‘WaylandEnable=False’ is also setup for us.
Next, setup the VNC password on the server for the VNC viewer at the client. The VNC password is what will be used by the VNC client to login to the server. We can login to any user account on the server — but it’s not best practice to login to the root account.
Red Hat recommends that you do not configure the
rootuser to export a VNC session. ArootVNC session is unsafe and certain elements of the session might not work as expected.
For convenience we’ll login to the OPC user account on the server from the VNC viewer. Set a password for the OPC user account as below:
# setup the VNC password on the server for the remote user
vncpasswd
# a view-only password is not required.
Note1: the password must be at least 6 characters. eg oracle.
Note2: the password defined here does not need to be the same as the regular password for the OPC account on the server.
Now configure the VNC service for the user account on the server.
sudo su -

# configure the VNC service as root
vim /etc/tigervnc/vncserver.users
Note: Port number 5900 and display number 0 represent the server user that is currently logged into the graphical session.
Red Hat recommends that you start with port number 5902 and display number 2 for the first user, and increment the numbers by one for each additional server user.
We could leave the defaults as they are, but to conform with the Red Hat recommendation, the display number will be incremented from 1 to a 2.
:2=opcInspect the VNC server config:
vim /etc/tigervnc/vncserver-config-defaultsThe basic VNC server defaults are already setup as follows:
session=gnome
geometry=1280x1024
Note: by default, a user can only open a single VNC session. Can also add ‘alwaysshared’ to allow multiple users to login at the same time.
Start the service
Now as the OPC user on the server — not root — start the VNC service for OPC.
Important: do not start the VNC service for the OPC user, as the root user, by mistake!!!
# Needs to be using the OPC user - not root
sudo systemctl daemon-reload
sudo systemctl start --now vncserver@:2.service

# enable to autostart
sudo systemctl enable --now vncserver@:2.service
As an option, you can do a health check of the service:
# using the opc user
systemctl status vncserver@:2.service
If all is well the service will be active and running.

A status of ‘active (running)’ shows that the service is healthy.
Setup the client for VNC
The latest TigerVNC source code is here:
Releases · TigerVNC/tigervnc (github.com)
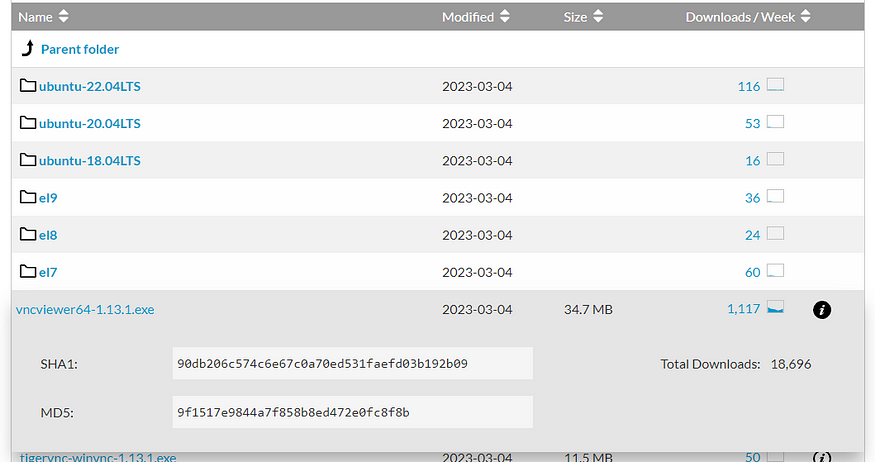
And the binaries (and the hash values), including the TigerVNC viewer binary for Windows is from here:
https://sourceforge.net/projects/tigervnc/files/stable/1.13.1/

So download the Windows TigerVNC viewer, then verify the binary with sha1sum.
# check the hash with Git for Windows (eg Git Bash)
# expect to see: Downloads/vncviewer64-1.13.1.exe: OK
sha1sum -c <(echo 90db206c574c6e67c0a70ed531faefd03b192b09 Downloads/vncviewer64-1.13.1.exe)
Then should see the message “Downloads/vncviewer64–1.13.1.exe: OK” to confirm that the binary is verified.
Start the VNC viewer
The VNC viewer does not encrypt communications natively, but there is an easy work around.
Red Hat recommends that you tunnel the VNC connection over SSH to your VNC port. As a result, the SSH tunnel keeps the connection encrypted.
We need to setup a local port forward to the Oracle Linux Cloud Developer instance.
On a terminal, setup a local port forward as follows:
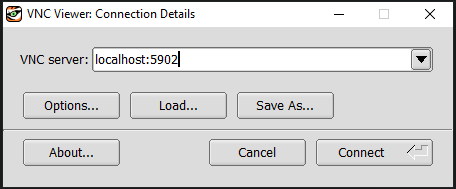
ssh -i ~/.ssh/id_rsa opc@<cloud_instance_IP_address> -N -L 5902:localhost:5902Then execute the VNC viewer like this:
# can execute from Git for Windows (ie Git Bash)
~/Downloads/vncviewer64-1.13.1.exe

# alternative
~/Downloads/vncviewer64-1.13.1.exe localhost:5902
Enter ‘localhost:5902’ this was how we setup the SSH local port forward.

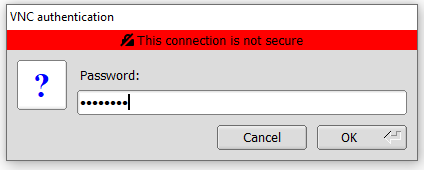
Then enter the password defined earlier for the remote OPC user.

Note: there is a warning about the connection being insecure, as the native VNC protocol is not secure. But a local port forward over SSH makes the connection secure.

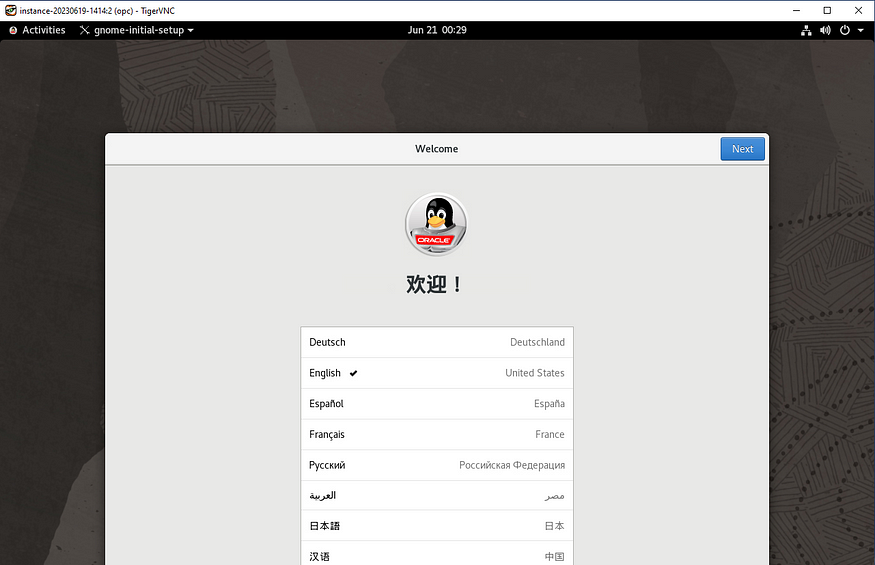
And we’re in.
Paul Guerin has presented at some of the world’s leading Oracle conferences, including Oracle Open World 2013. Since 2015, his work has been featured in the IOUG Best Practices Tip Booklet, and in publications from AUSOUG, Oracle Technology Network, Quest, and Oracle Developers (Medium). In 2019, he was awarded as a most valued contributor for the My Oracle Support Community. He continues to be a participant of the Oracle ACE program.
No comments:
Post a Comment